In the world of photovoltaic (PV) systems, the reliability of your energy harvest is only as strong as your weakest connection. For DIY solar enthusiasts and professional installers alike, the difference between a high-efficiency system and a fire hazard often comes down to one critical factor: the quality of the termination. This is where a professional-grade Terminal Kit and the right crimping tools become indispensable assets.
As a Senior Electrical Engineer at TONFUL, I have analyzed countless system failures, and a significant percentage trace back to poor crimping or inadequate connector selection. Whether you are outfitting a camper van, building an off-grid cabin, or installing a residential backup system, understanding the nuances of your connection hardware is paramount.
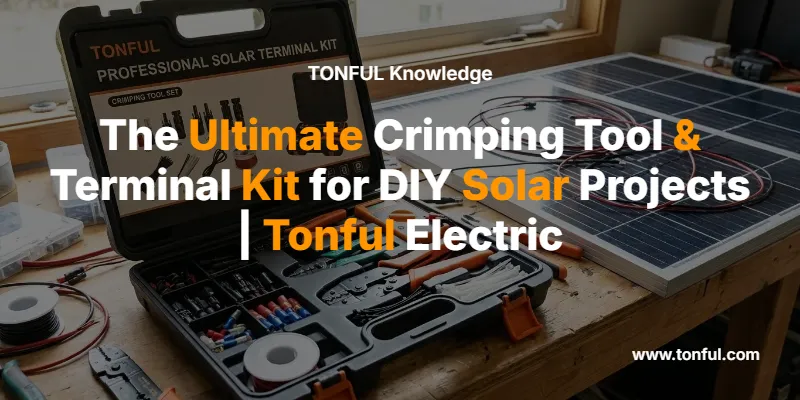
This guide explores the essential components of a solar Terminal Kit, how to select the right tools, and the engineering principles behind a perfect, gas-tight crimp.
Why a Dedicated Terminal Kit is Critical for Solar
Solar installations face unique challenges: thermal cycling (hot days, cold nights), UV radiation, moisture, and vibration. Standard automotive connectors often fail under these conditions. A specialized solar Terminal Kit provides components engineered to withstand these harsh environments, ensuring low resistance and high mechanical strength.
Investing in a comprehensive crimping terminal organizer box solution ensures you have the correct connector for every gauge and application, from the solar panel array down to the battery bank and inverter.
Anatomy of a Professional Solar Terminal Kit
A robust kit is more than just a box of parts; it is a curated system of compatible components. Here is what every serious DIY solar project requires:
1. MC4 Connectors (The Solar Standard)
The universal standard for connecting solar panels. These must be UV-resistant and IP67/IP68 rated.
- Application: Series and parallel connections of PV modules.
- Key Feature: Locking mechanism to prevent accidental disconnection.
2. Heat Shrink Terminals
For connections exposed to the elements or in battery compartments, heat shrink terminals are superior to standard vinyl or nylon insulated terminals.
- Ring Terminals: For connecting charge controllers and inverters to battery posts.
- Butt Connectors: For splicing wires securely.
- Spade/Fork Terminals: For terminal blocks on fuse boxes.
Pro Tip: Always choose terminals with adhesive-lined heat shrink tubing. When heated, the adhesive melts and seals the wire entry, preventing corrosion.
3. Wire Ferrules (Bootlace Ferrules)
Often overlooked in DIY projects, ferrules are essential when connecting stranded wire to screw terminals (like those found on MPPT charge controllers and breakers). They prevent stray strands from causing short circuits and ensure maximum contact area. Learn more about what a bootlace ferrule is to understand their critical role in safety.

Wire Gauge Selection: The Foundation of Safety
Selecting the correct wire gauge (AWG) is critical to prevent voltage drop and overheating. Your Terminal Kit must contain connectors sized appropriately for these gauges.
Solar Wire Gauge & Terminal Color Code Table
| AWG Size | ISO Metric (mm2) | Terminal Color Code | Typical Solar Application | Max Amperage (Approx)* |
|---|---|---|---|---|
| 22-16 AWG | 0.5 – 1.5 mm2 | Red | Low power sensors, LED lighting | 10-15A |
| 16-14 AWG | 1.5 – 2.5 mm2 | Blue | Small panels (<100W), accessories | 15-25A |
| 12-10 AWG | 4.0 – 6.0 mm2 | Yellow | Main PV wiring, Charge Controllers | 30-40A |
| 8 AWG+ | 10 mm2+ | Non-Insulated/Heavy Duty | Battery Banks, Inverters | 50A+ |
*Note: Amperage ratings vary based on insulation type and temperature rating. Always consult NEC tables.
For outdoor solar arrays, ensure you are using UV resistant solar wire connectors to prevent insulation breakdown over time.
The Heart of the Kit: The Crimping Tool
A terminal is only as good as the tool that compresses it. In the world of electrical tools manufacturing, there are two main categories relevant to DIY solar:
1. Ratcheting Crimpers (Recommended)
Ratcheting crimpers are the gold standard for DIYers. They feature a mechanism that prevents the jaws from opening until the full crimp cycle is complete. This guarantees that every crimp receives the exact required pressure, eliminating the “under-crimping” error common with cheap plier-style tools.
2. Hydraulic Crimpers
For large battery cables (4 AWG, 2 AWG, 1/0 AWG and larger), a manual ratcheting tool provides insufficient force. Hydraulic crimpers are necessary for these heavy-duty lugs.

Step-by-Step Guide: Creating a Gas-Tight Solar Connection
A “gas-tight” crimp is one where the wire strands and the connector body are compressed so tightly that they form a solid mass, preventing oxygen from entering and causing corrosion.
Step 1: Preparation
Cut the wire cleanly. Strip the insulation to the length recommended by the terminal manufacturer (usually 1/4″ to 3/8″). Do not nick the copper strands.
Step 2: Terminal Selection
Choose the correct terminal from your Terminal Kit. The wire should fit snugly into the barrel without forcing it, but shouldn’t be loose enough to fall out.
Step 3: Positioning
Insert the terminal into the correct color-coded die of your crimping tool. Squeeze the handles slightly to hold the terminal in place without crushing it.
Step 4: Insertion and Crimp
Insert the stripped wire into the terminal barrel. Ensure the insulation butts up against the barrel (for insulated terminals) or the wire stop. Squeeze the handles firmly until the ratchet releases.
Step 5: Inspection and Heat Shrink
Perform a “pull test” by firmly tugging the wire and terminal. If it moves, cut it off and start over. If using heat shrink terminals, apply heat using a heat gun until the tubing shrinks and adhesive flows.
For detailed instructions on specific types, read our guide on how to crimp heat shrink terminals correctly.

Common Crimping Mistakes to Avoid
Even with the best Terminal Kit, user error can compromise the system.
- Using the Wrong Die: Crimping a blue (14 AWG) terminal in a yellow (10 AWG) die results in a loose connection that will overheat.
- Twisting Stranded Wire: Unlike wire nuts, you should generally not twist wire strands before inserting them into a crimp terminal, as it can create uneven compression.
- Over-Crimping: Applying too much force (often with non-ratcheting tools) can crack the terminal barrel or damage the wire strands, reducing current capacity.
- Ignoring Moisture: For marine or outdoor solar, failing to use waterproof connectors is a critical error. See our guide on waterproof wire connectors for outdoor solutions.

Buying Guide: What to Look for in a Terminal Kit
When sourcing a kit for your business or project, consider the following specifications:
- Material Quality: Look for pure copper terminals (tinned for corrosion resistance). Avoid aluminum or unknown alloys which have higher resistance.
- Insulation Type: Polyolefin (Heat Shrink) is superior to Vinyl or Nylon for solar applications.
- Case Durability: A broken latch means 500 terminals mixed together. Look for robust locking mechanisms.
- Variety: A good kit includes rings (M4, M5, M6, M8 sizes), forks, spades, and butt splices.
Comparison: Basic vs. Pro Solar Terminal Kits
| Feature | Basic Automotive Kit | TONFUL Solar Pro Terminal Kit |
|---|---|---|
| Insulation | Vinyl / PVC | Adhesive-Lined Heat Shrink |
| Conductor | Brass / Aluminum Alloy | Tinned Pure Copper |
| Waterproof | No | Yes (IP67 Rated when shrunk) |
| Temp Rating | 75°C | 105°C – 125°C |
| Voltage Drop | Moderate | Minimal (High Conductivity) |
For retailers and repair shops, stocking comprehensive assorted boxes provides the versatility needed for various customer requirements.

Conclusion
A solar power system is a long-term investment, designed to last 25 years or more. While panels and inverters get the glory, the humble crimp terminal is the unsung hero that keeps the energy flowing safely. By equipping yourself with a high-quality Terminal Kit and mastering the art of the crimp, you ensure your DIY solar project remains efficient, safe, and reliable for decades.
At TONFUL, we specialize in manufacturing the high-performance terminals and connectors that professionals trust. Don’t let a $0.10 connector ruin a $10,000 system—choose quality, choose precision, choose safety.
Frequently Asked Questions (FAQ)
Q1: Can I use standard automotive crimpers for MC4 connectors?
No. MC4 connectors require a specific open-barrel die set that rolls the metal wings over the wire strands and insulation. Using standard automotive pliers will result in a dangerous connection that may arc and melt.
Q2: Do I need to solder solar connections after crimping?
Generally, no. A proper gas-tight crimp is mechanically stronger and electrically superior to solder for this application. Soldering can create a “hard spot” in the wire that is brittle and prone to breaking under vibration.
Q3: What is the difference between insulated and non-insulated terminals?
Insulated terminals have a plastic sleeve (vinyl, nylon, or heat shrink) attached for safety and short-circuit protection. Non-insulated terminals are typically used where the connection will be covered later or for high-heat applications, but heat-shrink insulated terminals are preferred for solar to prevent corrosion.
Q4: How do I know if my crimp is good?
Perform a pull test. For a 12 AWG wire, the crimp should withstand significant pull force (approx. 70-80 lbs) without separating. Visually, the wire should not move, and the insulation should not be cracked.
Q5: Why are tinned copper terminals better for solar?
Bare copper oxidizes (turns green) when exposed to air and moisture, increasing electrical resistance. Tin plating creates a barrier that protects the copper, maintaining high conductivity over the system’s lifespan.
Q6: Where can I buy a complete terminal assortment?
TONFUL offers a wide range of assorted boxes and electrical tools tailored for B2B procurement and professional installers, ensuring you have the right parts for every job.