Heat shrinking wire connectors involves sliding heat shrink tubing over the connection, applying controlled heat (typically 200-300°F) using a heat gun or hair dryer, and allowing the tubing to contract around the wires for a secure, weatherproof seal. This process creates professional-grade electrical connections that resist moisture, corrosion, and mechanical stress.
Understanding how to properly heat shrink wire connectors is essential for anyone working with electrical repairs, automotive wiring, or electronics projects. This guide covers everything you need to know to create reliable, code-compliant connections every time.
What Are Heat Shrink Wire Connectors?

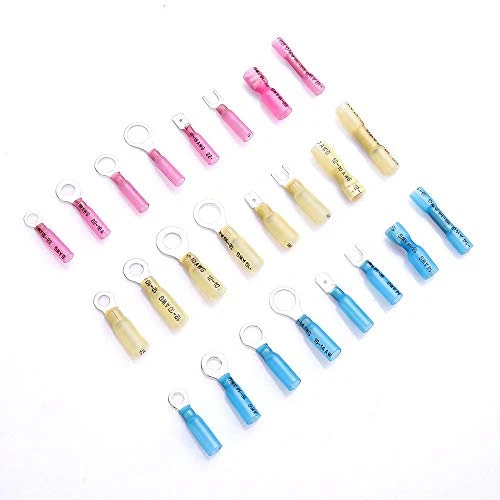
Heat shrink wire connectors are specialized electrical components that combine wire joining functionality with protective insulation. When heated, the thermoplastic tubing contracts to form a tight seal around wire connections, providing both electrical insulation and environmental protection.
Key Components:
- Heat shrink tubing: Thermoplastic sleeve that contracts when heated
- Wire connector: Crimp connector, butt splice, or terminal inside the tubing
- Adhesive lining: Many heat shrinks include adhesive for waterproofing
Heat Shrink Connector Types Comparison Table
| Connector Type | Best Use Case | Shrink Ratio | Temperature Range | Waterproof Rating |
|---|---|---|---|---|
| Butt Splice | End-to-end wire joining | 3:1 | -55°F to 275°F | IP67 |
| Ring Terminal | Grounding connections | 2:1 | -40°F to 200°F | IP65 |
| Spade Terminal | Quick disconnects | 2:1 | -40°F to 200°F | IP65 |
| Wire Tap | Mid-wire connections | 4:1 | -65°F to 300°F | IP68 |
| Branch Connector | Multiple wire joining | 3:1 | -55°F to 275°F | IP67 |
Essential Tools and Materials
Required Tools
- Heat gun (preferred) or hair dryer
- Wire strippers (10-22 AWG capacity)
- Crimping tool (matching connector size)
- Digital multimeter for testing
- Safety glasses
Material Requirements
- Heat shrink connectors (appropriate gauge)
- Electrical wire (matching AWG rating)
- Heat-resistant work surface
- Wire brush or sandpaper (for corrosion removal)
💡 Expert Tip: Always use a heat gun with temperature control rather than an open flame. Open flames can overheat the tubing and damage the wire insulation.
Step-by-Step Heat Shrinking Process
Step 1: Prepare the Wires
- Strip wire ends to the length specified on the connector (typically 1/4″ to 3/8″)
- Clean oxidation from copper using wire brush or sandpaper
- Twist stranded wires tightly to prevent spreading during insertion
Step 2: Insert Wires into Connector
- Slide heat shrink tubing over one wire before making connection
- Insert stripped wire ends fully into connector barrel
- Ensure wire bottoms out against the connector stop
Step 3: Crimp the Connection
- Position crimping tool over the metal barrel
- Apply firm, steady pressure until crimp is complete
- Check crimp quality – wire should not pull out with moderate force
Step 4: Position Heat Shrink Tubing
- Center tubing over the connection point
- Ensure equal coverage on both sides of the crimp
- Verify no bare wire is exposed outside the tubing
Step 5: Apply Heat for Shrinking
- Set heat gun to 400-500°F (200-260°C)
- Keep gun moving in circular motions around the tubing
- Heat evenly starting from one end, working toward the other
- Stop when tubing has fully contracted and adhesive appears at edges
Step 6: Cool and Test
- Allow connection to cool for 30-60 seconds
- Test continuity with multimeter
- Perform gentle pull test to verify mechanical strength
Heat Shrink Temperature Guidelines
| Heat Source | Temperature | Shrink Time | Best For |
|---|---|---|---|
| Heat Gun (Low) | 400°F | 15-30 seconds | Standard tubing |
| Heat Gun (High) | 750°F | 5-10 seconds | Heavy-wall tubing |
| Hair Dryer | 200°F | 60-90 seconds | Light-duty applications |
| Heat Torch | 1000°F+ | 2-5 seconds | NOT RECOMMENDED |
Common Applications and Use Cases

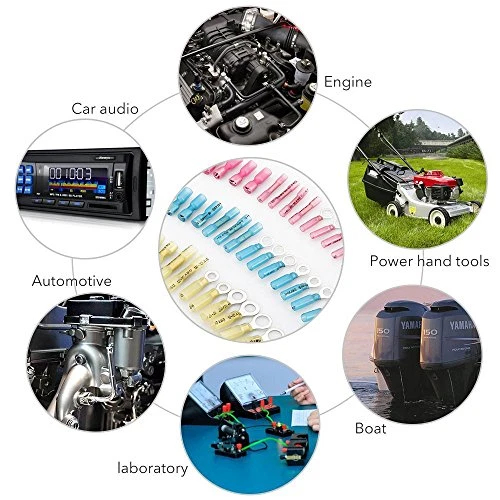
Automotive Wiring
- Trailer hitch connections: Waterproof 7-pin connectors
- Engine bay repairs: Heat and chemical resistant connections
- Marine applications: Salt water resistant terminations
Home Electrical Projects
- Landscape lighting: Outdoor low-voltage connections
- Appliance repairs: UL-listed connections for safety compliance
- Extension cord repairs: Weatherproof splice connections
Electronics and Technology
- Audio equipment: Noise-resistant signal connections
- Computer modifications: Clean, professional cable management
- Solar installations: UV-resistant DC connections
Professional Selection Criteria
Wire Gauge Matching
Critical Requirement: Heat shrink connector must match wire AWG rating exactly. Using oversized connectors creates loose connections; undersized connectors won’t accept the wire.
| Wire AWG | Connector Size | Typical Applications |
|---|---|---|
| 22-18 AWG | Small | LED lighting, electronics |
| 16-14 AWG | Medium | Automotive accessories |
| 12-10 AWG | Large | High-current applications |
Environmental Considerations
- Indoor use: Standard PVC tubing sufficient
- Outdoor applications: UV-resistant polyolefin required
- Marine environments: Adhesive-lined, salt-resistant materials
- High temperature: PTFE or FEP tubing for extreme conditions
💡 Expert Tip: For critical applications, choose connectors with dual-wall construction and adhesive lining for maximum reliability.
Troubleshooting Common Problems
Poor Heat Shrink Results
Problem: Tubing doesn’t shrink evenly
- Cause: Insufficient or uneven heat application
- Solution: Use lower temperature with longer exposure time
Problem: Adhesive doesn’t seal properly
- Cause: Contaminated wire surfaces
- Solution: Clean wires with alcohol before assembly
Connection Failures
Problem: Wire pulls out of connector
- Cause: Inadequate crimp or wrong tool
- Solution: Use proper crimping tool with correct die size
Problem: High resistance connection
- Cause: Oxidized or dirty wire surfaces
- Solution: Clean wire thoroughly before crimping
Code Compliance and Safety Standards
National Electrical Code (NEC) Requirements
- Article 110.14(B): Splices must be accessible unless permanently installed
- Section 300.15: All connections must be contained in approved junction methods
- UL Listed components: Required for code compliance in most jurisdictions
Installation Standards
- Torque specifications: Follow manufacturer’s requirements
- Environmental ratings: Match connector rating to application
- Temperature derating: Consider ambient temperature in calculations
Quick Reference Checklist
Before Starting:
- ☐ Correct AWG rating match
- ☐ Appropriate environmental rating
- ☐ All tools and materials ready
- ☐ Power disconnected and verified
During Installation:
- ☐ Proper wire strip length
- ☐ Clean, oxidation-free surfaces
- ☐ Complete crimp engagement
- ☐ Even heat application
- ☐ No overheating of adjacent insulation
Final Inspection:
- ☐ No exposed conductor
- ☐ Adhesive visible at tubing edges
- ☐ Continuity test passed
- ☐ Mechanical pull test completed
- ☐ Connection properly secured
Frequently Asked Questions
What temperature should I use for heat shrinking?
Use 400-500°F (200-260°C) for standard tubing. Start with lower temperatures and increase if needed. Excessive heat can damage wire insulation and compromise the connection.
Can I use a hair dryer instead of a heat gun?
Yes, but it will take longer (60-90 seconds vs 15-30 seconds). Hair dryers work well for light-duty applications but may not provide sufficient heat for heavy-wall tubing.
How do I know if the connection is properly sealed?
Look for adhesive appearing at the edges of the tubing and ensure the tubing has shrunk snugly around the wires with no gaps or loose areas.
What’s the difference between standard and marine-grade heat shrink?
Marine-grade connectors feature adhesive lining, higher IP ratings (IP67-IP68), and materials resistant to salt water corrosion. They’re essential for boat and waterfront applications.
Can heat shrink connectors be reused?
No, heat shrink tubing cannot be reused once heated. The molecular structure changes during shrinking, and attempting to reheat will damage the material.
How long do heat shrink connections last?
Properly installed heat shrink connections can last 20+ years in normal conditions. Marine and extreme environment applications may require replacement every 5-10 years.
Do I need special tools for different connector sizes?
Yes, crimping tools must match the connector size for proper compression. Universal tools often don’t provide adequate crimp force for reliable connections.
What wire stripping length should I use?
Strip wire to the length specified by the connector manufacturer, typically 1/4″ to 3/8″. Too little leaves poor contact; too much creates short circuits.
Expert Tips for Professional Results
💡 Temperature Control: Start with lower heat settings and gradually increase. It’s better to take longer than to overheat and damage components.
💡 Work Surface: Use a heat-resistant mat to protect your work area and provide a stable surface for consistent results.
💡 Testing Protocol: Always test connections with a multimeter before final installation. A good connection should show less than 0.1 ohms resistance.
💡 Documentation: Keep records of connection locations and dates for maintenance scheduling, especially in marine or industrial applications.
Professional Recommendation: For critical electrical work, consult with a licensed electrician to ensure code compliance and safety. While heat shrink connections are DIY-friendly, complex installations may require professional expertise for warranty and safety reasons.

