Quick Answer
Quick Answer: You can successfully heat shrink wire connectors using a hair dryer, lighter flame, soldering iron, hot air from a space heater, boiling water, oven heat, or even a candle flame. The most effective alternatives are a hair dryer on high heat (safest option) or a soldering iron tip (most precise control).
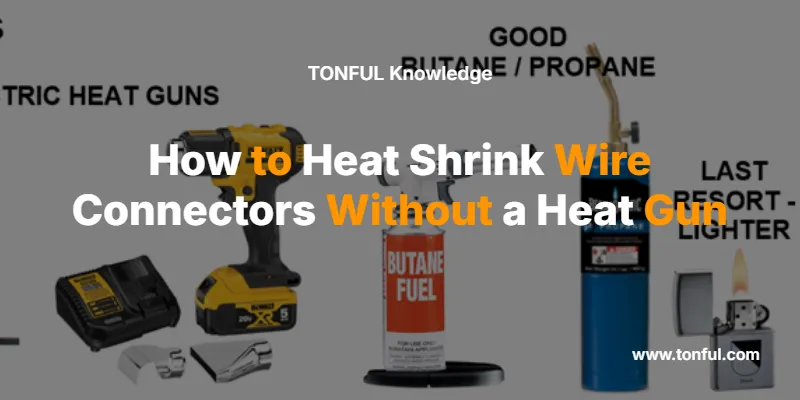
Heat shrink tubing provides essential protection for electrical connections, but you don’t always have a dedicated heat gun available. Whether you’re working on automotive wiring, home electronics, or emergency repairs, these proven alternatives will help you create professional-quality connections safely and effectively.
What Is Heat Shrink Tubing and Why It Matters
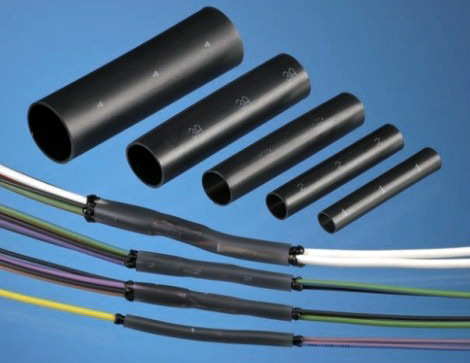
Heat shrink tubing is a thermoplastic tube that contracts when heated, creating a tight seal around wire connections. It serves three critical functions:
- Electrical insulation to prevent short circuits and electrical shock
- Environmental protection against moisture, dust, and corrosion
- Mechanical strain relief to prevent wire breakage at connection points
Understanding proper shrinking techniques ensures reliable, long-lasting electrical connections that meet safety standards and prevent costly failures.
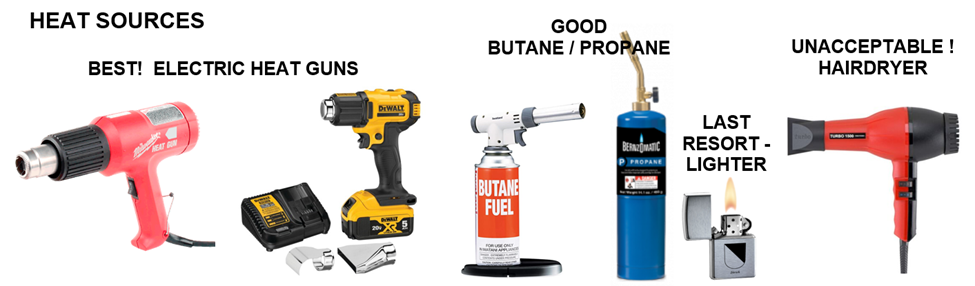
Complete Comparison: Heat Gun Alternatives That Work
Here is a table that shows the complete comparison of heat gun alternatives:
| Method | Temperature Range | Safety Level | Precision Control | Best Use Case | Time Required |
|---|---|---|---|---|---|
| Hair Dryer | 140-180°F | Excellent | Good | Multiple connectors, beginners | 2-3 minutes |
| Soldering Iron | 350-450°F | Good | Excellent | Single connectors, precision work | 30-60 seconds |
| Lighter Flame | 1000°F+ | Moderate | Poor | Emergency repairs only | 15-30 seconds |
| Hot Air (Space Heater) | 150-200°F | Good | Fair | Bulk work, larger tubing | 3-5 minutes |
| Boiling Water | 212°F | Excellent | Poor | Heat-sensitive components nearby | 1-2 minutes |
| Oven Heat | 200-300°F | Good | Fair | Batch processing | 2-4 minutes |
| Candle Flame | 1000°F+ | Moderate | Poor | True emergencies only | 20-40 seconds |
Method 1: Hair Dryer Technique (Recommended for Beginners)
Why This Works: Hair dryers produce controlled hot air at the ideal temperature range for most heat shrink tubing without risk of overheating.
Step-by-Step Process:
- Prepare your workspace – Work on a non-conductive surface away from flammable materials
- Set hair dryer to highest heat setting – Ensure it’s clean and functioning properly
- Position tubing – Center the heat shrink over your connection with equal overhang on both sides
- Apply heat in circular motions – Hold dryer 2-3 inches away, moving continuously
- Monitor shrinkage – Watch for even contraction without bubbling or scorching
- Cool naturally – Allow 2-3 minutes for complete cooling and final set
Method 2: Soldering Iron Technique (Best Precision)
Why This Works: Soldering irons provide precise temperature control and concentrated heat application, perfect for delicate work.
Step-by-Step Process:
- Heat soldering iron to 350-400°F – Use a temperature-controlled iron when possible
- Clean the iron tip – Remove any solder residue with a damp sponge
- Hold tubing steady – Use heat-resistant tweezers or small pliers
- Apply indirect heat – Hold iron tip 1/4 inch from tubing surface
- Rotate slowly – Ensure even heat distribution around the entire circumference
- Check shrinkage progress – Stop immediately when tubing fits snugly
Method 3: Open Flame Techniques (Emergency Use Only)
Why This Works: Direct flame provides intense, immediate heat but requires extreme caution and skill.
Lighter Method:
- Use a quality butane lighter – Avoid cheap, inconsistent flames
- Hold tubing with needle-nose pliers – Never use your fingers
- Keep flame moving constantly – Prevent hot spots and burning
- Maintain 2-inch minimum distance – Closer risks immediate damage
- Work in short bursts – 2-3 second intervals with cooling breaks
Candle Method:
- Use a stable candle holder – Prevent tipping and fire hazards
- Position tubing above flame edge – Not directly in the flame
- Rotate continuously – Ensure even heating pattern
- Watch for color changes – Stop at first sign of browning
Method 4: Hot Air from Space Heater
Why This Works: Space heaters with fan settings can direct warm air similar to a heat gun, though at lower temperatures.
Step-by-Step Process:
- Use ceramic or fan-forced heater – Avoid radiant-only models
- Set to highest safe setting – Usually 1500W with fan
- Create air funnel – Use cardboard to direct airflow
- Position 6-8 inches away – Closer may damage heater elements
- Move tubing through airstream – Don’t hold stationary
- Allow extended heating time – 3-5 minutes for complete shrinkage
Method 5: Boiling Water Method (Safest Option)
Why This Works: Boiling water provides consistent 212°F heat, perfect for standard heat shrink tubing activation temperature.
Step-by-Step Process:
- Boil clean water in appropriate container – Use enough for full submersion
- Prepare tongs or tweezers – For safe handling of hot tubing
- Submerge tubing completely – Ensure even water contact
- Time carefully – 60-90 seconds maximum
- Remove and cool immediately – Dip in room temperature water
- Check fit and seal – May require second treatment for thick tubing
Method 6: Oven Heat Method (Batch Processing)
Why This Works: Ovens provide controlled, even heat distribution ideal for processing multiple connectors simultaneously.
Step-by-Step Process:
- Preheat oven to 250°F – Never exceed 300°F for standard tubing
- Use aluminum foil tray – Create clean, non-reactive surface
- Space connectors evenly – Prevent touching and uneven heating
- Monitor through oven window – Watch for proper shrinkage
- Remove at first sign of completion – Usually 2-4 minutes
- Cool on wire rack – Allow air circulation for faster cooling
Safety Requirements and Code Compliance
Essential Safety Standards:
- NEC Article 110.14 – Electrical connections must be suitable for conditions of use
- UL 224 Standard – Heat shrink tubing specifications and performance requirements
- OSHA 1926.95 – Personal protective equipment for electrical work
Mandatory Safety Practices:
- Always wear safety glasses – Protect against hot plastic particles
- Use insulated tools – Prevent electrical shock during live work
- Ensure adequate ventilation – Avoid inhaling plastic fumes
- Keep fire suppression nearby – Class C fire extinguisher for electrical fires
- Test connections before energizing – Verify proper insulation and continuity
Troubleshooting Common Problems
Problem: Tubing Won’t Shrink
Solutions:
- Increase temperature or heating time
- Verify tubing is heat-activated type (not cold-shrink)
- Check for moisture contamination
- Try different heating method with higher temperature
Problem: Uneven Shrinkage
Solutions:
- Maintain constant movement during heating
- Ensure consistent distance from heat source
- Pre-warm tubing gradually before main heating
- Use wider heat source for better distribution
Problem: Burned or Discolored Tubing
Solutions:
- Reduce temperature or increase distance
- Use shorter heating intervals with cooling breaks
- Switch to gentler heating method
- Replace damaged tubing completely
Problem: Tubing Splits or Cracks
Solutions:
- Select larger diameter tubing for application
- Reduce heating temperature to prevent overheating
- Ensure proper tubing material for temperature range
- Apply lubricant during installation to reduce stress
Selection Criteria: Choosing the Right Method
For Professional Work:
- Hair dryer method – Consistent results, safe operation
- Soldering iron method – Precision control, professional appearance
For Emergency Repairs:
- Boiling water method – Safest option with common materials
- Lighter method – Quick results when time-critical (use extreme caution)
For Bulk Processing:
- Oven method – Batch efficiency, even results
- Space heater method – Large tubing, extended work sessions
Expert Tips for Professional Results
Temperature Control Guidelines:
- Standard polyolefin tubing: 200-250°F optimal
- Military-grade tubing: 275-300°F required
- Thin-wall tubing: 180-220°F maximum
- Thick-wall applications: 250-300°F needed
Quality Indicators:
Good shrink: Smooth surface, even thickness, snug fit
Proper adhesion: No air bubbles, complete seal
Correct color: Original color maintained
Flexible finish: Bends without cracking
Poor shrink: Wrinkled surface, loose areas, discoloration
Overheated: Brittle texture, burned smell, splits
Professional Installation Standards:
- Tubing length: Extend 1/4 inch beyond connection on each side
- Overlap coverage: Minimum 1/2 inch over insulation
- Diameter selection: 2:1 or 3:1 shrink ratio for proper fit
- Environmental rating: Match application requirements (moisture, temperature, chemical)
When to Call a Professional
Seek professional electrical help when:
- Working with high-voltage systems (over 50 volts)
- Installing connections in wet locations
- Dealing with fire alarm or life safety systems
- Unsure about proper wire gauge or connector selection
- Local codes require licensed electrician work
Certification Requirements: Many jurisdictions require licensed electricians for:
- Permanent building wiring installations
- Service panel connections
- Commercial or industrial applications
- Any work requiring electrical permits
Frequently Asked Questions
What temperature do I need to shrink heat shrink tubing?
Most standard heat shrink tubing activates between 200-250°F (93-121°C). Military-grade and specialized tubing may require temperatures up to 300°F (149°C). Always check manufacturer specifications for your specific tubing type.
Can I use a hair dryer on any size heat shrink tubing?
Hair dryers work best on small to medium tubing (up to 1/2 inch diameter). For larger tubing, you’ll need higher temperatures or longer heating times. Consider oven or space heater methods for tubing over 3/4 inch diameter.
How long should I heat the tubing?
Heating time depends on tubing size and heat source temperature. Hair dryers typically require 2-3 minutes, while soldering irons need only 30-60 seconds. Stop heating immediately when tubing fits snugly – overheating causes damage.
Is it safe to use open flame on heat shrink tubing?
Open flame methods work but carry significant safety risks including fire hazards, toxic fumes, and easy overheating. Use flame methods only in emergencies when safer alternatives aren’t available. Always work outdoors with proper ventilation.
What’s the safest alternative to a heat gun?
Boiling water is the safest method, providing consistent 212°F temperature without fire risk or toxic fumes. It’s especially good when working near heat-sensitive components or in confined spaces.
Can I reuse heat shrink tubing if I overheat it?
No, overheated tubing loses its protective properties and should be replaced. Signs of overheating include discoloration, brittleness, cracks, or burned smell. Always use fresh tubing for reliable protection.
Why won’t my heat shrink tubing shrink?
Common causes include insufficient temperature, moisture contamination, or using cold-shrink tubing by mistake. Verify you have heat-activated tubing and try increasing temperature or heating time gradually.
What happens if I don’t heat shrink my wire connectors?
Unprotected connections are vulnerable to moisture, corrosion, and accidental contact. This can cause short circuits, equipment damage, fire hazards, or electrical shock. Proper heat shrinking is essential for safety and reliability.
Conclusion: Master Professional Heat Shrinking Without a Heat Gun
You now have seven proven methods to heat shrink wire connectors safely and effectively without a dedicated heat gun. The hair dryer method offers the best balance of safety and effectiveness for most applications, while the soldering iron provides superior precision for detailed work.
Remember that proper heat shrinking is about more than just making the tubing smaller – it’s about creating reliable, long-lasting electrical connections that protect both your circuits and your safety. Always prioritize safety over speed, and don’t hesitate to consult a professional electrician for complex installations or when local codes require licensed work.
Ready to tackle your next electrical project? Choose the method that best fits your situation, gather your safety equipment, and create professional-quality connections with confidence. Your properly protected wire connections will provide reliable service for years to come.