Reusing waterproof wire nuts creates significant safety hazards including compromised sealing, weakened connections, electrical arcing, and increased fire risk. The silicone or gel sealant inside these connectors degrades after initial use, and the spring mechanism loses tension, making reused wire nuts unreliable for protecting electrical connections from moisture and maintaining secure contact.
Understanding these risks can prevent electrical failures, equipment damage, and potential fire hazards in your electrical installations. This guide provides everything you need to know about waterproof wire nut safety and proper usage.
What Are Waterproof Wire Nuts?
Waterproof wire nuts (also called moisture-resistant or direct-burial wire connectors) are specialized electrical connectors designed to protect wire joints from water, moisture, and environmental exposure. Unlike standard wire nuts, they contain a waterproof silicone or dielectric gel sealant that creates a moisture barrier around the connection.
These connectors are essential for outdoor electrical work, underground wiring, landscape lighting, sprinkler systems, pool equipment, and any application where connections may be exposed to moisture or buried in the ground.
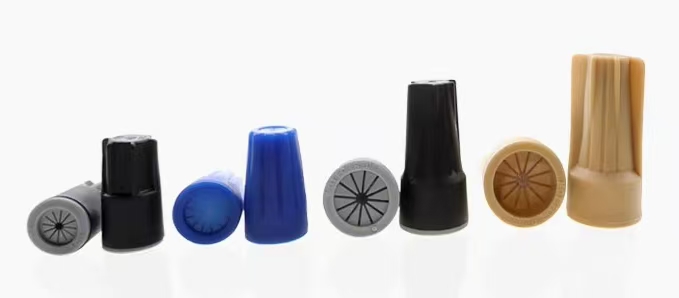
Key Features:
- Silicone or dielectric gel-filled interior for moisture sealing
- Color-coded by wire gauge capacity (same as standard wire nuts)
- Spring-loaded metal coil for securing wire connections
- Rated for direct burial and outdoor use when properly installed
- Compliant with National Electrical Code (NEC) Article 300.5 for underground installations
Critical Risks of Reusing Waterproof Wire Nuts
1. Compromised Waterproof Seal
The primary risk of reusing waterproof wire nuts is seal failure. The silicone gel or sealant inside these connectors is designed for one-time use. When you remove a waterproof wire nut, the sealant:
- Loses its uniform distribution around the wires
- Becomes contaminated with dirt, debris, or oxidation
- Cannot reform a complete moisture barrier on reinstallation
- May have partially migrated out of the connector
Safety Impact: A compromised seal allows moisture to contact bare wire connections, leading to corrosion, short circuits, and connection failure.
2. Weakened Spring Tension
The internal spring mechanism that grips the wires loses effectiveness with each use:
- Metal fatigue reduces clamping force
- Twisted wires may not seat properly in the worn threads
- Connection resistance increases from poor contact
- Wires can work loose over time from vibration or thermal cycling
Safety Impact: Loose connections create high-resistance points that generate heat, potentially causing arcing, melted insulation, or fire.
3. Physical Damage During Removal
Removing a waterproof wire nut often damages both the connector and the wire:
- Wire strands break or bend during untwisting
- Insulation may be nicked or compromised
- The connector’s threads can become deformed
- Gel sealant may tear or puncture the connector housing
Safety Impact: Damaged wires have reduced current-carrying capacity and increased failure risk. Deformed connectors won’t grip properly.
4. Contamination of Electrical Connection
Once exposed, the wire connection and remaining sealant become contaminated:
- Oxidation forms on exposed copper conductors
- Dirt and debris mix with the silicone gel
- Moisture may have already penetrated before removal
- Contaminants create high-resistance points
Safety Impact: Contaminated connections increase resistance, generate heat, and accelerate corrosion, leading to complete connection failure.
5. Code Compliance Violations
Reusing waterproof wire nuts violates electrical code requirements:
- NEC mandates proper materials and methods for wet locations (Article 300.5)
- Manufacturer instructions specify single-use application
- Building inspectors will fail installations using reused connectors
- Insurance claims may be denied for electrical fires caused by improper connections
Safety Impact: Code violations create liability issues and may void warranties or insurance coverage.
Waterproof Wire Nuts vs. Standard Wire Nuts: Key Differences
Here is a table that shows the critical differences between waterproof and standard wire nuts:
| Feature | Waterproof Wire Nuts | Standard Wire Nuts | Implication for Reuse |
|---|---|---|---|
| Interior Sealant | Silicone gel or dielectric compound | None (air-filled) | Sealant depletes/contaminates, cannot be restored |
| Moisture Protection | Rated for wet locations and direct burial | Dry locations only | Compromised seal eliminates primary function |
| Cost per Unit | $0.50-$2.00 each | $0.10-$0.30 each | Higher cost tempts reuse but risks are severe |
| Installation Method | Single-use, twist-on application | Can be removed and reapplied | Standard nuts reusable, waterproof are not |
| NEC Compliance | Article 300.5 for underground | Article 334 for general wiring | Reused waterproof nuts fail code requirements |
| Seal Integrity | Factory-sealed with virgin sealant | No seal to maintain | Cannot recreate factory seal conditions |
| Expected Lifespan | 20+ years when properly installed | 30+ years in dry locations | Reused waterproof nuts may fail within months |
When Waterproof Wire Nuts Are Required (vs. When Standard Nuts Are Acceptable)
Understanding proper application prevents both unnecessary costs and dangerous substitutions:

Waterproof Wire Nuts Required:
- Underground electrical wiring (direct burial applications)
- Outdoor junction boxes and connection points
- Wet location installations (pools, fountains, irrigation)
- Landscape and exterior lighting systems
- Marine and dock electrical work
- Areas with high humidity or condensation potential
Standard Wire Nuts Acceptable:
- Indoor electrical boxes in dry locations
- Interior wall and ceiling junction boxes
- Residential circuit wiring in conditioned spaces
- Control panel internal connections
- Temporary test connections on workbenches
Expert Tip: Never substitute standard wire nuts for waterproof applications, even temporarily. Moisture infiltration can cause dangerous electrical failures within hours in some conditions.
The Cost vs. Safety Analysis: Why Reuse Is Never Worth It
New waterproof wire nuts cost $0.50-$2.00 each, while the consequences of reusing them include:
Potential Costs of Connection Failure:
- Equipment replacement: $100-$10,000+
- Electrical fire damage: $5,000-$100,000+
- Service call for troubleshooting failed connections: $150-$400
- Rewiring and repair labor: $200-$1,000+
- Injury or property damage liability: Unlimited potential exposure
- Insurance deductibles and premium increases: $500-$5,000+
Risk Multiplier: A single $1 waterproof wire nut protects connections that may control thousands of dollars in equipment or prevent devastating electrical fires.
How to Identify Previously Used Waterproof Wire Nuts
If you’re working with existing electrical installations, check for these signs of reused connectors:
Visual Indicators:
- Depleted or missing silicone gel sealant
- Visible contamination or discoloration inside the connector
- Gel residue on the outside of the connector
- Deformed or damaged connector threads
- Bent or broken wire strands at the connection point
Performance Indicators:
- Intermittent power or flickering lights
- Warm junction boxes or connectors
- Corrosion visible on wire conductors
- Loose connections that can be wiggled
- Melted or discolored insulation near the connector
⚠️ Safety Warning: If you discover reused waterproof wire nuts in an existing installation, replace them immediately with new connectors. The failure risk increases exponentially over time.
Proper Installation Best Practices for Waterproof Wire Nuts
To maximize safety and longevity, follow these professional installation steps:
Step 1: Select the Correct Size
- Match connector color code to wire gauge (reference manufacturer chart)
- Verify the connector is rated for the number and size of conductors
- Confirm the connector meets NEC requirements for your application
Step 2: Prepare Wire Ends
- Strip insulation to expose 3/4 inch of bare conductor
- Ensure all wire strands are intact (trim damaged ends)
- Hold stripped wires parallel with ends aligned evenly
- Clean any oxidation from copper conductors
Step 3: Install the Connector
- Push wires firmly into the connector opening
- Twist the wire nut clockwise until tight (typically 3-5 full turns)
- Verify no bare wire is exposed below the connector skirt
- Gentle tug test should not dislodge wires
Step 4: Verify Seal Integrity
- Check that silicone gel fills all gaps around wires
- Ensure the connector is seated firmly at the base
- Verify the connection feels solid with no movement
- Inspect for proper alignment and full engagement
Step 5: Complete the Installation
- Coil excess wire neatly in the junction box
- Ensure no stress or tension on the connection
- Follow manufacturer guidelines for burial depth (typically 12-18 inches)
- Label the connection for future reference
Expert Tip: For critical outdoor or buried connections, consider using heat-shrink tubing over the waterproof wire nut for double protection, especially in direct-burial applications.
Alternative Solutions for Permanent Outdoor Connections
When working with outdoor electrical connections, consider these professional alternatives:
Splice Kits with Sealant Tape:
- Professional-grade heat-shrink butt splices
- Self-vulcanizing silicone tape wrapping
- Better for high-vibration applications
- More expensive but extremely reliable
Sealed Junction Boxes:
- NEMA-rated weatherproof enclosures
- Standard wire nuts inside protected environment
- Easier to access for future maintenance
- Required by code for many outdoor applications
Direct-Burial Cable with Factory Splices:
- Pre-made cable assemblies with sealed connections
- Eliminates field splicing risks
- Higher upfront cost but maximum reliability
- Ideal for permanent landscape lighting installations
Comparison Table: Connection Methods for Outdoor Use
| Method | Cost | Reliability | Reusability | Best Application |
|---|---|---|---|---|
| Waterproof Wire Nuts | Low | Good (when new) | Single-use only | Standard outdoor connections |
| Heat-Shrink Splice Kits | Medium | Excellent | Single-use only | Permanent underground runs |
| Sealed Junction Box | Medium-High | Excellent | Connectors inside reusable | Accessible outdoor locations |
| Factory Splice Cable | High | Superior | N/A (permanent) | Landscape lighting systems |
Common Mistakes That Increase Reuse Risks
Even when using new waterproof wire nuts, these errors compromise safety:
1. Insufficient Wire Stripping
- Too little bare wire prevents proper contact with the spring coil
- Connection resistance increases, generating dangerous heat
- Gel sealant cannot properly surround the insulated portion
2. Mixed Wire Gauges
- Combining different wire sizes in one connector creates loose connections
- Smaller wires may not engage the spring mechanism
- Larger wires may prevent proper seating
3. Over-Tightening
- Excessive force can break wire strands inside the connector
- May damage the spring coil or deform the housing
- Gel sealant can be forced out of the connector
4. Under-Tightening
- Loose connections create high resistance and heat
- Wires may pull out under tension or vibration
- Moisture can penetrate an incompletely sealed connection
5. Reusing After “Quick Check”
- Briefly removing a wire nut to verify connections still contaminates the sealant
- Even momentary exposure can allow moisture and debris inside
- “Just checking” connections still requires new connectors
Expert Tip: If you need to verify an outdoor connection, use a non-contact voltage tester or multimeter rather than opening the connection. Opening means replacing.
What to Do When You Must Troubleshoot an Outdoor Connection
Sometimes you need to access buried or outdoor connections for repairs or modifications:
Professional Troubleshooting Process:
Step 1: Diagnosis Without Opening
- Use a multimeter to test voltage and continuity
- Check for tripped breakers or GFCI devices
- Inspect visible portions of the circuit
- Look for signs of damage to junction boxes or cable
Step 2: Document Before Opening
- Photograph the existing installation
- Note wire colors and their connections
- Record the location for future reference
- Verify you have replacement materials on hand
Step 3: Safe Removal
- Turn off power at the breaker and verify with a tester
- Carefully remove the old waterproof wire nut
- Inspect wires for damage, corrosion, or moisture
- Trim back damaged wire ends if needed
Step 4: Proper Reconnection
- Use completely new waterproof wire nuts
- Follow installation best practices (see above)
- Test the circuit thoroughly before burying
- Update your documentation with the repair date
Step 5: Consider Upgrades
- If connections fail repeatedly, upgrade to sealed junction boxes
- Evaluate whether wire gauge is adequate for the load
- Check if direct-burial cable would be more appropriate
- Consult an electrician for persistent problems
⚠️ Safety Warning: If you’re not comfortable working with electrical connections, hire a licensed electrician. The cost of professional help is far less than the consequences of improper electrical work.
Frequently Asked Questions
Can I reuse a waterproof wire nut if it still looks good?
No, you should never reuse waterproof wire nuts even if they appear undamaged. The internal silicone sealant cannot recreate a proper moisture barrier once disturbed, and the spring tension weakens with each use. The small cost of a new connector is not worth the significant safety risks.
How long do waterproof wire nuts last when properly installed?
When installed correctly with new connectors, waterproof wire nuts can last 20-30 years or more in most outdoor environments. The key is proper installation the first time and never disturbing the connection unless absolutely necessary for repairs.
What’s the difference between waterproof wire nuts and standard wire nuts?
Waterproof wire nuts contain silicone gel or dielectric sealant that creates a moisture barrier around the wire connection. Standard wire nuts are hollow inside and only suitable for dry indoor locations. Waterproof versions cost 3-10 times more but are essential for outdoor and underground applications.
Can I just add more silicone to a used waterproof wire nut?
No, you cannot effectively restore a waterproof wire nut by adding sealant. The factory seal is created under controlled conditions with precisely measured sealant. Field-applied silicone cannot achieve the same protection level and may actually trap moisture inside the connection.
Are waterproof wire nuts required by electrical code?
The National Electrical Code (NEC) requires appropriate connection methods for wet locations and underground installations (Articles 300.5 and 314.15). While the code doesn’t mandate specific products, waterproof wire nuts or equivalent moisture-sealed connections are necessary to meet these requirements.
What size waterproof wire nut do I need?
Waterproof wire nuts use the same color-coding as standard wire nuts. Match the connector size to your wire gauge and number of conductors. Common sizes: orange (2-3 #22-#14 wires), yellow (2-4 #14-#12 wires), red (2-4 #14-#10 wires). Always verify the manufacturer’s specifications for your specific application.
Can I use heat shrink tubing instead of waterproof wire nuts?
Heat shrink tubing provides excellent moisture protection but must be used with proper splice connectors underneath (crimp or solder connections). For twisted wire connections, waterproof wire nuts are specifically designed for this application. Professional splice kits combining both methods offer maximum protection for critical connections.
What should I do if I find corroded connections inside waterproof wire nuts?
Corrosion indicates the waterproof seal has failed. Cut back the corroded wire to fresh copper, strip new ends, and reconnect using new waterproof wire nuts. If corrosion is extensive, you may need to replace longer sections of cable. This is a sign the original connection was compromised and requires immediate attention.
Expert Tips for Long-Term Outdoor Electrical Reliability
Professional Recommendations:
Tip #1: Buy Quality Connectors
Invest in name-brand waterproof wire nuts from reputable manufacturers (3M, Ideal, Gardner Bender). Cheap no-name connectors may have inferior sealant that degrades quickly or inadequate spring tension from the start.
Tip #2: Keep Spares On Site
Maintain a supply of various sizes of waterproof wire nuts in your electrical toolkit. When you need to troubleshoot an outdoor connection, having new connectors immediately available prevents the temptation to reuse old ones.
Tip #3: Document Your Installations
Photograph connections before burying them and keep records of wire colors, locations, and installation dates. This documentation makes future troubleshooting much easier and helps prevent unnecessary connection disturbances.
Tip #4: Use Drip Loops
For above-ground outdoor connections, create drip loops in the wire before it enters junction boxes. This prevents water from running along the wire into the connection, reducing stress on the waterproof seal.
Tip #5: Bury at Proper Depth
Follow NEC requirements for burial depth (typically 12-18 inches depending on wire type and protection). Shallow burial increases risks from digging, frost heaving, and physical damage that could disturb your connections.
Tip #6: Consider Conduit Protection
While direct-burial cable with waterproof wire nuts is code-compliant, running wire through underground conduit provides additional protection and makes future wire replacement possible without disturbing connections.
The Bottom Line: When Safety Meets Economics
Waterproof wire nuts are engineered as single-use components. The $0.50-$2.00 cost of a new connector is trivial compared to the risks of connection failure, equipment damage, fire hazards, and code violations.
Professional electricians never reuse waterproof wire nuts because they understand that reliable electrical connections are fundamental to safety. The same standard should apply to all electrical work, whether performed by professionals or capable DIY homeowners.
Your Action Plan:
- Always purchase new waterproof wire nuts for every connection
- Follow proper installation procedures for maximum reliability
- Document your work for future reference
- Replace any suspected reused connectors in existing installations
- Consult a licensed electrician if you’re uncertain about any aspect of the work
By prioritizing safety over short-term savings, you ensure reliable electrical performance and protect your property, equipment, and family from preventable electrical hazards.
Need Professional Help? If you’re working with outdoor electrical systems, complex underground wiring, or high-voltage applications, consult a licensed electrician. Professional installation ensures code compliance, proper materials selection, and safe, reliable connections that will last for decades.