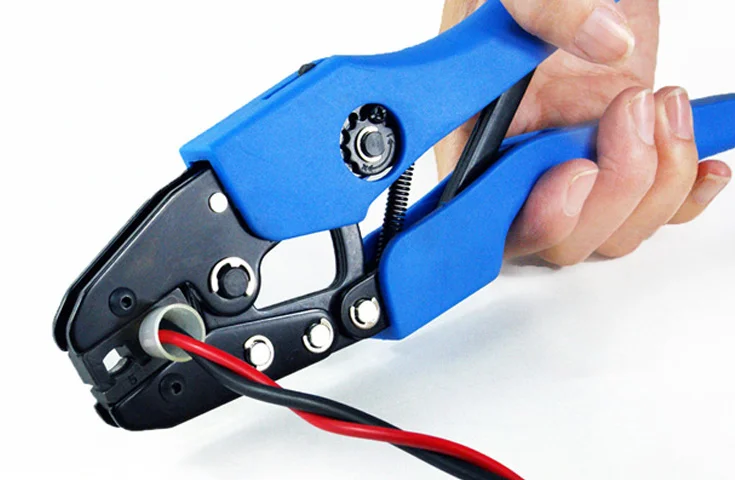
Wire crimps typically last 25-30 years under normal conditions, but their lifespan depends on connection quality, environmental factors, and material specifications. Professional crimps made with proper tools and quality terminals can maintain reliable connections for the entire service life of electrical installations.
Understanding crimp longevity is crucial for electrical safety, system reliability, and compliance with electrical codes. This comprehensive guide covers everything you need to know about crimp durability, failure modes, and best practices.
What Are Electrical Crimps?

Electrical crimps are mechanical connections that join wires to terminals or other conductors by compressing a metal sleeve around the wire strands. The crimping process creates a gas-tight connection through cold welding, where metal-to-metal contact forms a permanent bond without heat.
Key Components:
- Crimp terminal: The metal connector with connection point and wire barrel
- Wire conductor: Stranded or solid copper wire being terminated
- Crimp connection: The compressed joint between terminal and wire
Crimp Lifespan by Type and Application
Here is a table that shows typical crimp lifespans across different applications:
| Crimp Type | Environment | Expected Lifespan | Key Factors |
|---|---|---|---|
| Indoor residential | Controlled climate | 25-30+ years | Low moisture, stable temperature |
| Commercial building | HVAC controlled | 20-25 years | Regular maintenance, code compliance |
| Industrial equipment | Variable conditions | 15-20 years | Vibration, temperature cycling |
| Automotive | Engine compartment | 10-15 years | Heat, vibration, chemical exposure |
| Marine/outdoor | Weather exposed | 5-10 years | Corrosion, UV exposure, moisture |
| Aerospace | Extreme conditions | 20-30 years | High-quality materials, strict standards |
Key Factors Affecting Crimp Longevity
Material Quality
- Wire composition: Pure copper vs. copper-clad aluminum
- Terminal plating: Tin, silver, or gold plating for corrosion resistance
- Insulation type: PVC, XLPE, or specialty compounds
Environmental Conditions
- Temperature range: -40°F to 200°F typical operating range
- Humidity levels: Below 85% relative humidity preferred
- Chemical exposure: Acids, bases, and solvents accelerate degradation
- UV radiation: Causes insulation breakdown in outdoor applications
Installation Quality
- Proper crimp tool: Ratcheting tools ensure consistent compression
- Correct die size: Matching terminal and wire gauge specifications
- Strip length: Proper conductor exposure without nicking
- Compression force: Adequate but not excessive crimping pressure
How Crimps Fail: Common Failure Modes
Immediate Failures (0-5 years)
- Poor initial crimp: Insufficient compression or wrong tool
- Wire damage: Nicked conductors during stripping
- Contamination: Oil, dirt, or oxidation preventing proper connection
- Mismatched components: Wrong terminal size for wire gauge
Long-term Degradation (10+ years)
- Corrosion: Galvanic reactions between dissimilar metals
- Thermal cycling: Expansion and contraction loosening connections
- Vibration fatigue: Mechanical stress causing micro-fractures
- Insulation breakdown: Environmental exposure degrading protection
Comparison: Crimp vs. Other Connection Methods

Here is a table that shows how crimps compare to other electrical connection methods:
| Connection Method | Lifespan | Installation Time | Reliability | Maintenance | Cost |
|---|---|---|---|---|---|
| Crimp terminals | 25-30 years | 30 seconds | Very High | None required | Low |
| Screw terminals | 20-25 years | 2-3 minutes | High | Periodic tightening | Medium |
| Wire nuts | 15-20 years | 1 minute | Medium | Visual inspection | Very Low |
| Solder joints | 30+ years | 5 minutes | Very High | None required | Medium |
| Push-in connectors | 10-15 years | 10 seconds | Medium | None possible | Low |
🔧 Expert Tip: Crimped connections consistently outperform screw terminals in vibration-prone environments because they create a permanent, mechanically secure connection that doesn’t require maintenance.
Applications and Use Cases
Residential Electrical Systems
- Panel connections: Main service and branch circuit terminations
- Fixture installations: Light fixtures and ceiling fans
- HVAC systems: Air conditioning and heating equipment connections
- Expected lifespan: 25-30 years with proper installation
Commercial and Industrial Applications
- Motor control centers: High-current connections requiring reliability
- Control panels: Signal and power distribution systems
- Instrumentation: Process control and monitoring equipment
- Expected lifespan: 15-25 years depending on environment
Automotive and Transportation
- Engine harnesses: High-temperature, vibration-resistant connections
- Chassis wiring: Structural and safety system connections
- Electronic systems: ECU and sensor connections
- Expected lifespan: 10-15 years under normal driving conditions
How to Select Long-Lasting Crimps
Wire and Terminal Compatibility
- Match gauge specifications: Use terminals rated for specific wire sizes
- Consider strand count: Fine-strand wire requires different terminals
- Check voltage rating: Ensure terminals meet circuit requirements
- Verify current capacity: Size terminals for maximum expected load
Environmental Considerations
- Temperature rating: Select terminals rated above maximum operating temperature
- Corrosion resistance: Use tinned or precious metal plated terminals
- Sealing requirements: Choose insulated or heat-shrink covered terminals
- Vibration resistance: Specify automotive-grade terminals for mobile applications
Quality Standards and Certifications
- UL Listed: Underwriters Laboratories safety certification
- CSA Approved: Canadian Standards Association approval
- Military spec: MIL-T specifications for harsh environment applications
- Automotive grade: SAE and ISO standards for vehicle applications
⚠️ Safety Warning: Always verify that crimp terminals are rated for the specific voltage, current, and environmental conditions of your application. Using underrated components can result in fire hazards and equipment damage.
Step-by-Step Guide to Long-Lasting Crimps
Preparation Phase
- Select proper tools: Use ratcheting crimp tools with correct die sets
- Gather materials: Quality terminals, proper gauge wire, heat shrink tubing
- Plan the connection: Determine routing, strain relief, and access requirements
- Clean work area: Remove contaminants that could affect connection quality
Installation Process
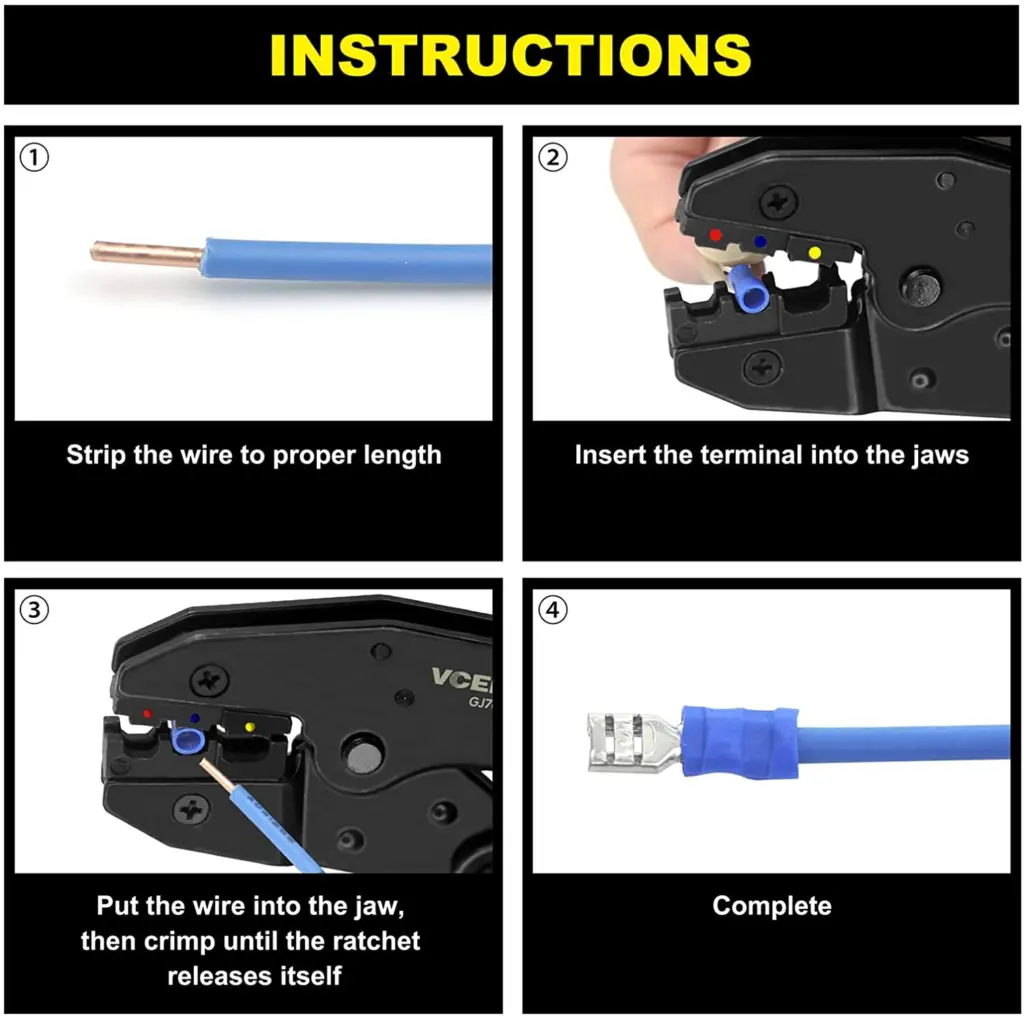
- Strip wire to specification: Remove insulation to match terminal barrel length
- Inspect conductor: Check for nicks, corrosion, or damaged strands
- Insert wire fully: Ensure conductor reaches bottom of terminal barrel
- Position crimp tool: Align terminal and die for proper compression
- Apply crimping force: Use full ratchet cycle for consistent compression
- Verify connection: Perform pull test to confirm mechanical integrity
Quality Verification
- Visual inspection: Check for proper barrel deformation and conductor visibility
- Pull test: Apply force equal to wire tensile strength
- Resistance measurement: Verify low-resistance connection with multimeter
- Documentation: Record terminal specifications and installation date
Maintenance and Inspection Guidelines
Periodic Inspection Schedule
- Annual visual inspection: Look for corrosion, damage, or loose connections
- 5-year detailed inspection: Remove covers and check hidden connections
- 10-year testing: Measure connection resistance and thermal performance
- Environmental triggers: Inspect after flooding, extreme temperatures, or chemical exposure
Warning Signs of Crimp Failure
- Discoloration: Heat damage or corrosion indicators
- Physical deformation: Swelling, cracking, or separation
- Electrical symptoms: Voltage drop, arcing, or intermittent operation
- Thermal indicators: Hot spots detected during infrared inspection
🔧 Expert Tip: Use infrared thermography during electrical inspections to identify high-resistance crimps before they fail. Temperature differences of 10°F or more compared to adjacent connections indicate potential problems.
Troubleshooting Common Crimp Problems
High Resistance Connections
Symptoms: Voltage drop, heating, reduced performance
Causes: Inadequate compression, contamination, corrosion
Solutions: Re-crimp with proper tools, clean surfaces, apply anti-oxidant compound
Mechanical Failure
Symptoms: Wire pullout, terminal separation, physical damage
Causes: Wrong terminal size, insufficient crimping force, vibration
Solutions: Use correct specifications, verify tool calibration, add strain relief
Environmental Degradation
Symptoms: Corrosion, insulation damage, moisture intrusion
Causes: Improper sealing, material incompatibility, harsh conditions
Solutions: Upgrade to sealed terminals, use protective coatings, relocate connections
Professional Standards and Code Requirements
National Electrical Code (NEC) Requirements
- Article 110.3(B): Use terminals according to manufacturer instructions
- Article 110.14: Ensure terminals are suitable for conductor material and size
- Article 300.13: Provide mechanical continuity for conductor systems
Industry Standards
- UL 486A/B: Standard for wire connectors and splicing devices
- ASTM B173: Specification for rope-lay-stranded copper conductors
- IEEE 1185: Guide for installation of cable using tension
⚠️ Safety Warning: Local electrical codes may have specific requirements for crimp connections in different applications. Always consult local authorities having jurisdiction before beginning electrical work.
When to Call a Professional
Complex Applications
- High-voltage systems: Above 600V requires specialized knowledge
- Critical safety circuits: Emergency systems, fire alarms, security
- Code compliance: Commercial and industrial installations
- Specialized environments: Hazardous locations, marine applications
Quality Assurance Requirements
- Certification needed: Work requiring electrical permits and inspections
- Liability concerns: Commercial and public safety applications
- Warranty requirements: Manufacturer specifications for equipment connections
- Insurance compliance: Professional installation for coverage requirements
Frequently Asked Questions
What makes one crimp last longer than another?
Quality materials, proper installation technique, and environmental protection are the primary factors. Professional-grade terminals with appropriate plating and correctly sized crimping tools create connections that last decades longer than poor-quality alternatives.
Can you re-crimp a connection that’s failing?
No, crimped connections cannot be re-crimped safely. The metal deformation process is permanent, and attempting to re-crimp can damage the conductor. Failed crimps must be cut out and replaced with new terminals.
How do you know when a crimp needs replacement?
Visual signs include discoloration, corrosion, physical damage, or loose connections. Electrical symptoms like voltage drop, heating, or intermittent operation also indicate crimp problems requiring replacement.
Are expensive crimp terminals worth the cost?
Yes, quality terminals with proper plating and materials significantly outlast cheap alternatives. The cost difference is minimal compared to the expense and safety risks of premature failure in electrical systems.
What’s the difference between automotive and electrical crimps?
Automotive crimps are designed for higher vibration, temperature cycling, and chemical exposure. They typically use thicker plating, more robust insulation, and specialized sealing to survive harsh vehicle environments.
Can crimps be used in wet locations?
Standard crimps should not be used in wet locations without proper protection. Use sealed, waterproof terminals or enclosures rated for wet locations. Marine-grade terminals with heat-shrink sealing are recommended for moisture-prone applications.
How often should crimped connections be inspected?
Annual visual inspections are recommended for most applications, with detailed inspections every 5 years. High-vibration, high-temperature, or harsh environments may require more frequent inspection intervals.
What causes crimps to fail prematurely?
Poor installation technique, wrong terminal size, contamination during installation, and environmental exposure beyond design limits are the primary causes of premature crimp failure.
Conclusion
Properly installed crimped connections provide 25-30 years of reliable service in most applications, making them one of the most durable electrical connection methods available. Success depends on using quality materials, proper installation techniques, and environmental protection appropriate for the application.
Key takeaways for maximum crimp longevity:
- Invest in quality terminals and proper crimping tools
- Follow manufacturer specifications for terminal selection and installation
- Protect connections from environmental extremes when possible
- Perform regular inspections to catch problems early
- Consult professionals for critical applications and code compliance
For electrical work requiring permits, high-voltage applications, or critical safety systems, consult with a licensed electrician to ensure proper installation and code compliance. Professional installation ensures optimal performance and longevity while maintaining safety and warranty coverage.

