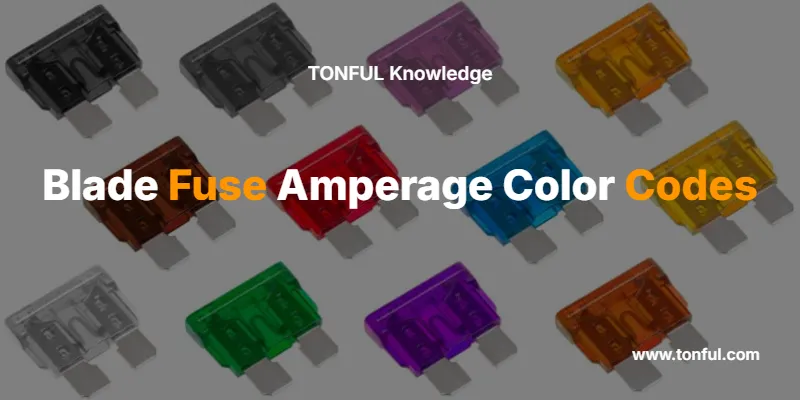
Blade fuses use standardized color coding to indicate amperage ratings, making it easy to identify the correct fuse at a glance. The color system follows industry standards established by the SAE (Society of Automotive Engineers) and ISO, ensuring consistency across automotive and electrical applications.
Quick Answer: Standard blade fuse colors range from tan (1A) to brown (7.5A) to red (10A) through purple (3A) and up to blue (15A), green (30A), and beyond. The most common automotive fuses are rated between 5A and 30A, with color coding that remains consistent across mini, standard (ATO/ATC), and maxi blade fuse types.
Understanding these color codes helps you quickly identify blown fuses, select proper replacements, and maintain electrical safety in vehicles, RVs, boats, and other applications. Using the wrong amperage fuse can damage circuits or create fire hazards.
What Are Blade Fuse Amperage Color Codes?
Blade fuse amperage color codes are standardized color designations that correspond to specific current ratings. This universal system was developed to prevent confusion and reduce the risk of installing incorrect fuses that could damage electrical systems or create safety hazards.
The color coding system serves three critical purposes:
- Instant visual identification – You can identify a fuse’s amperage without reading tiny printed numbers
- Safety standardization – Prevents accidental installation of incorrect amperage ratings
- Universal compatibility – The same color means the same amperage across brands and manufacturers
The color system applies to three main blade fuse types: mini blade fuses, standard blade fuses (ATO/ATC), and maxi blade fuses. While the physical sizes differ, the color-to-amperage relationship remains consistent.
Complete Blade Fuse Color Code Chart
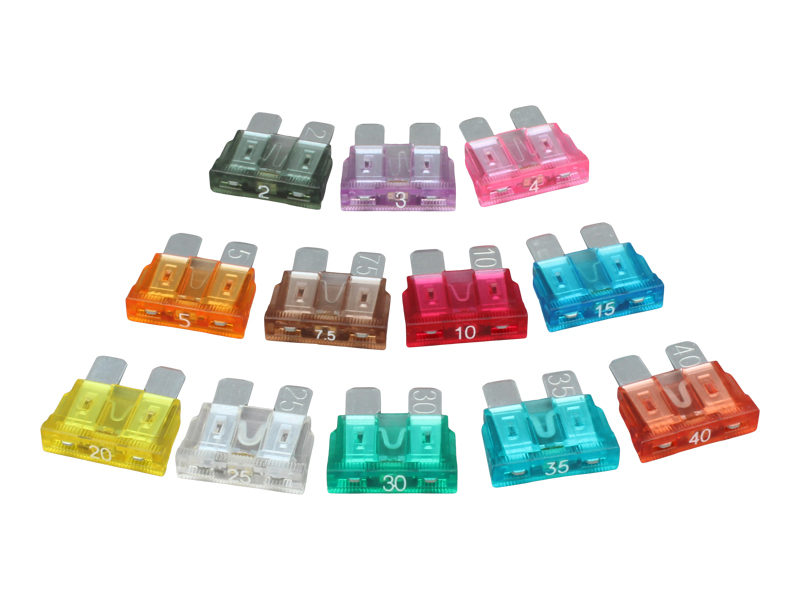
Here is a table that shows the universal blade fuse amperage color codes used across the automotive and electrical industries:
| Fuse Color | Amperage Rating | Common Applications | Typical Circuits |
|---|---|---|---|
| Black | 1A | Low-power electronics | Instrument clusters, LEDs |
| Gray/Grey | 2A | Delicate electronics | Clock circuits, memory systems |
| Violet/Purple | 3A | Light-duty circuits | Interior lights, radio memory |
| Pink | 4A | Small accessories | Dashboard lights, indicators |
| Tan/Brown | 5A | Light accessories | Parking lights, gauge illumination |
| Brown | 7.5A | Small loads | Interior dome lights, radio |
| Red | 10A | Standard accessories | Power outlets, radio systems |
| Blue | 15A | Medium accessories | Cigarette lighter, audio systems |
| Yellow | 20A | Higher-load circuits | Power windows, fuel pump |
| Clear/Natural | 25A | Heavy accessories | Windshield wipers, ventilation fans |
| Green | 30A | High-current circuits | Power seats, sunroof motors |
| Teal/Aqua | 35A | Heavy-duty systems | Cooling fans, heated seats |
| Orange | 40A | High-power systems | Air conditioning, power steering |
| Red (Maxi) | 50A | Very high current | Main power feeds, battery systems |
| Blue (Maxi) | 60A | Heavy electrical loads | Alternator feeds, main circuits |
| Tan (Maxi) | 70A | Maximum loads | High-output charging systems |
| Clear (Maxi) | 80A | Extreme loads | Heavy-duty power distribution |
| Green (Maxi) | 100A | Highest ratings | Primary power distribution |
Important Note: Some color variations exist between manufacturers (especially for 25A and 35A ratings), but the core colors for common amperages (5A-30A) remain highly standardized.
What Makes Mini, Standard, and Maxi Blade Fuses Different?
Blade fuses come in three distinct physical sizes, each designed for different current-carrying requirements and space constraints:
Standard Blade Fuses (ATO/ATC)
Standard blade fuses measure approximately 19mm in height and are the most common type found in vehicles manufactured from the 1980s onward. You’ll find these in the main fuse panels of most cars, trucks, and SUVs.
Key characteristics:
- Size: 19mm tall, standard blade spacing
- Amperage range: 1A to 40A (most common: 5A-30A)
- Applications: General automotive circuits, accessories, lighting
- ATO vs ATC difference: ATO (open design) lacks the plastic housing of ATC (closed design), but both use identical color codes
Mini Blade Fuses (ATM)
Mini blade fuses are approximately 11mm tall—nearly half the size of standard fuses. They became popular in the 1990s as vehicles added more electronic systems requiring compact fuse panel designs.
Key characteristics:
- Size: 11mm tall, narrower blade spacing
- Amperage range: 2A to 30A (identical color coding to standard)
- Applications: Modern vehicles with space-limited fuse boxes, electronic modules
- Advantages: Allow more circuits in smaller spaces, common in newer vehicles
Maxi Blade Fuses (APX)
Maxi blade fuses are the largest format at approximately 35mm tall, designed for high-current applications that exceed standard blade fuse capabilities.
Key characteristics:
- Size: 35mm tall, wider and more robust construction
- Amperage range: 20A to 100A (different color coding for high amperages)
- Applications: Main power feeds, alternator circuits, heavy-duty accessories
- Location: Often found in under-hood fuse boxes or battery junction boxes
Here is a comparison table that shows the key differences:
| Feature | Mini Blade | Standard Blade | Maxi Blade |
|---|---|---|---|
| Height | ~11mm | ~19mm | ~35mm |
| Amperage Range | 2A-30A | 1A-40A | 20A-100A |
| Common Use | Modern compact panels | General automotive | High-current circuits |
| Color Code System | Standard colors | Standard colors | Modified for high amps |
| Interchangeable | No | No | No |
| Introduction Era | 1990s | 1980s | 1980s |
Safety Warning: Never substitute one fuse type for another. Physical size differences exist for electrical and safety reasons. Using the wrong size can result in poor connections, overheating, or fire hazards.
How to Identify Your Blade Fuse Amperage
You can identify a blade fuse’s amperage through three reliable methods:
Method 1: Color Recognition (Quickest)
The fuse body color instantly tells you the amperage rating. This works for any blade fuse following SAE/ISO standards. Look at the plastic housing color—not the metal blades—to determine the rating.
Method 2: Printed Number Reading
All blade fuses have the amperage stamped or printed on top of the fuse body. You’ll see numbers like “10A,” “15,” or “20A” printed in white or black ink on the colored plastic.
Tip: In older fuses or dirty environments, printed numbers may fade or become illegible. The color coding provides a backup identification method.
Method 3: Fuse Panel Legend
Your vehicle’s fuse panel cover or owner’s manual includes a diagram showing which fuse protects which circuit. This legend typically lists both the fuse position number and the required amperage.
Common Blade Fuse Applications by Amperage
Understanding which amperage fuses protect specific circuits helps you troubleshoot electrical problems and select correct replacements:
Low Amperage Circuits (1A-7.5A)
1A-3A (Black, Gray, Purple):
- Instrument cluster lighting
- Clock and timer circuits
- LED lighting systems
- Electronic module memory circuits
- Low-power sensors
5A-7.5A (Tan, Brown):
- Parking lights and side markers
- License plate lights
- Dashboard illumination
- Radio memory circuits
- Interior courtesy lights
Medium Amperage Circuits (10A-20A)
10A (Red):
- AM/FM radio and audio systems
- Power outlets and accessory sockets
- Backup lights
- Interior dome lights
- Electronic control modules
15A (Blue):
- Cigarette lighter/12V power outlets
- Audio amplifiers
- Horn circuits
- Hazard flashers
- Fuel pump circuits (some vehicles)
20A (Yellow):
- Power window motors
- Fuel pump (most vehicles)
- Windshield washer pump
- Rear window defogger
- Ventilation fan motors
High Amperage Circuits (25A-40A+)
25A-30A (Clear, Green):
- Power seat motors
- Sunroof motors
- Radiator cooling fans
- Electric window regulators
- HVAC blower motors
35A-40A (Teal, Orange):
- Air conditioning compressor clutch
- Power steering systems
- Heated seat elements
- Rear window defogger (high-power)
- Multiple accessory feeds
50A-100A (Maxi fuses):
- Alternator output feeds
- Battery junction connections
- Main power distribution circuits
- Electric vehicle charging systems
- High-output audio amplifiers
How to Select the Right Blade Fuse Amperage
Choosing the correct fuse amperage is critical for electrical safety and system protection. Follow these expert guidelines:
Step 1: Identify the Required Amperage
Never guess at fuse amperage. Use one of these three reliable sources:
- Check the blown fuse – Read the number printed on top or identify the color
- Consult your owner’s manual – Locate the fuse panel diagram section
- Read the fuse panel legend – Found on the fuse box cover (interior or under-hood)
Step 2: Verify the Fuse Type
Confirm whether you need mini, standard, or maxi blade fuses by checking:
- Physical size of the fuse slot
- Fuse panel documentation
- Existing fuses in adjacent slots
Step 3: Match the Exact Amperage Rating
Install a fuse with the identical amperage rating as specified. The color coding helps you quickly confirm you have the right fuse.
Critical Safety Rule: Never install a higher amperage fuse than specified. A 20A fuse in a 15A circuit won’t provide proper overcurrent protection and can cause wire overheating or fires.
Step 4: Verify Fuse Quality
Purchase fuses from reputable automotive or electrical suppliers. Quality fuses feature:
- Clear, permanent amperage markings
- Consistent color coding matching standards
- Solid construction with no cracks or defects
- Proper metal blade thickness and plating
Expert Tip: Keep a blade fuse assortment in your vehicle for emergencies. A comprehensive kit contains the most common ratings (5A, 7.5A, 10A, 15A, 20A, 25A, 30A) in the correct fuse type for your vehicle.
What Causes Blade Fuses to Blow and How to Troubleshoot
A blown fuse indicates an overcurrent condition that the fuse correctly interrupted to protect the circuit. Understanding why fuses blow helps prevent repeated failures.
Common Causes of Blown Fuses
1. Short Circuit Conditions
A direct connection between positive and negative (or positive and ground) creates excessive current flow. This is the most serious cause and requires immediate repair.
Signs: Fuse blows immediately when installed, possible burning smell, may affect multiple circuits
2. Overloaded Circuits
Adding accessories or devices that draw more current than the circuit was designed to handle causes the fuse to blow during use.
Signs: Fuse blows only when accessories are operating, gradual failure over time
3. Worn or Damaged Components
Motors with worn bearings, frayed wiring, or corroded connections increase electrical resistance and current draw.
Signs: Fuse blows intermittently, happens more frequently over time, associated with specific component operation
4. Water Intrusion or Corrosion
Moisture in electrical connections creates current paths that shouldn’t exist, causing shorts or increased resistance.
Signs: Fuse failures during rain or high humidity, corrosion visible in fuse panel or connectors
5. Incorrect Fuse Installation
Using the wrong amperage fuse (too low) for a circuit causes nuisance blowing during normal operation.
Signs: Repeated failures despite no other symptoms, fuse works for a while then fails
Troubleshooting Process
Step 1: Inspect the Blown Fuse
Remove the fuse and examine the metal element inside. A blown fuse shows a visible gap or discolored metal.
- Clean break: Usually indicates normal overcurrent protection
- Blackened or burned appearance: Suggests severe short circuit
- Melted plastic housing: Indicates extreme overload; inspect circuit immediately
Step 2: Check for Obvious Problems
Before installing a new fuse:
- Inspect visible wiring for damage, rubbing, or exposed conductors
- Check connectors for corrosion or loose connections
- Verify no foreign objects in fuse panel
- Ensure no aftermarket accessories were recently added
Step 3: Install New Fuse and Test
Install the correct amperage fuse and test the circuit:
- Fuse holds: Problem may have been temporary or connection-related
- Fuse blows immediately: Serious short circuit exists; do not continue testing
- Fuse blows during operation: Circuit overload or component failure
Step 4: Determine Professional Assistance Need
Seek professional electrical diagnosis if:
- Fuses blow repeatedly with no obvious cause
- Multiple circuits fail simultaneously
- You smell burning or see smoke
- Fuse blows immediately upon installation
- You’re uncomfortable with electrical troubleshooting
Safety Warning: Never bypass a fuse or use a higher amperage rating to “solve” repeated blowing. Fuses are sacrificial safety devices. When they blow, they’re protecting expensive components or preventing fires. Address the root cause rather than defeating the protection system.
Blade Fuse Safety Standards and Compliance
Blade fuses must meet specific industry standards to ensure reliability and safety:
SAE Standards (Society of Automotive Engineers)
SAE J1284 – Primary standard for blade-type automotive fuses, specifying:
- Physical dimensions and tolerances
- Electrical performance requirements
- Current interruption capabilities
- Color coding standardization
- Terminal design and materials
ISO Standards (International Organization for Standardization)
ISO 8820 – International equivalent covering blade fuses globally:
- Harmonized color coding across markets
- Performance testing requirements
- Environmental resistance specifications
- Manufacturing quality standards
UL Recognition (Underwriters Laboratories)
Quality blade fuses carry UL recognition marks indicating:
- Compliance with safety standards
- Manufacturing quality verification
- Performance validation under fault conditions
Expert Tip: When purchasing replacement fuses, look for products marked “SAE J1284 Compliant” or “ISO 8820 Certified.” These markings ensure the fuses meet safety and performance standards.
Expert Tips for Blade Fuse Maintenance
Regular Inspection Schedule
Inspect your vehicle’s fuses during routine maintenance:
Every 6 months:
- Visual check of fuse panel for corrosion or damage
- Ensure fuse panel covers are securely installed
- Verify no moisture intrusion in fuse boxes
Annually:
- Remove and inspect high-current fuses (25A+) for heating damage
- Check fuse holder contacts for corrosion
- Verify all fuses are correct amperage per specifications
Proper Fuse Installation Technique
Install blade fuses correctly to prevent connection problems:
- Ensure fuse is fully seated – Push firmly until you feel/hear a click
- Install with correct orientation – Most fuses work either way, but check for directional markings
- Avoid touching metal blades – Oils from skin can promote corrosion
- Never force oversized fuses – Mini fuses don’t fit standard slots and vice versa
Storage and Organization
Keep replacement fuses organized and protected:
- Store in a dry, cool location (avoid extreme heat in vehicles)
- Use a labeled fuse assortment kit with separate compartments
- Replace fuses in your spare kit after use
- Protect fuses from metal contact that could cause shorts
Expert Tip: Take a photo of your fuse panel legend with your smartphone. This provides a quick reference when you need to identify fuse locations and ratings.
Quick Reference: Most Common Blade Fuse Colors
For fast identification, here are the fuse colors you’ll encounter most frequently in automotive applications:
Essential Ratings to Remember:
- Brown (7.5A) – Light circuits
- Red (10A) – Radio, lights, accessories
- Blue (15A) – Power outlets, audio
- Yellow (20A) – Power windows, pumps
- Green (30A) – Seats, cooling fans
These five amperage ratings cover approximately 80% of automotive fuse applications. Keeping these colors memorized helps with quick field identification and emergency replacements.
Frequently Asked Questions About Blade Fuse Color Codes
Can I use a higher amperage fuse if I don’t have the exact rating?
No, never use a higher amperage fuse than specified. Fuses are calibrated to protect the wiring and components in that specific circuit. A higher-rated fuse allows more current than the wire can safely handle, creating fire risks. If you don’t have the exact rating, it’s safer to operate without that circuit until you obtain the correct fuse.
Why did my fuse blow when the color looks correct?
Color identifies the amperage rating, but a blown fuse indicates an electrical problem in the circuit—not a fuse problem. The fuse did its job by interrupting excessive current. You need to identify and fix the underlying cause (short circuit, overload, or component failure) rather than just replacing the fuse.
Are blade fuse colors the same across all vehicle manufacturers?
Yes, blade fuse color codes follow SAE J1284 and ISO 8820 standards, making them universal across manufacturers. A blue 15A fuse is blue in a Ford, Toyota, BMW, or any other vehicle. However, some very old vehicles or non-standard applications may use different systems.
Can I replace a standard blade fuse with a mini blade fuse of the same color?
No, you cannot substitute different fuse types even if the colors match. Mini, standard, and maxi fuses have different physical dimensions and blade spacing. They won’t fit properly in the wrong fuse holder, and forcing them can damage the fuse panel or create poor electrical connections.
What should I do if a fuse keeps blowing repeatedly?
Stop replacing the fuse and diagnose the underlying problem. Repeated fuse failure indicates a circuit fault that needs repair—typically a short circuit, overloaded circuit, or failing component. Continuing to replace fuses without fixing the cause wastes money and leaves the real problem unaddressed. For persistent failures, seek professional electrical diagnosis.
How can I tell if a fuse is blown without removing it?
Many blade fuses are semi-transparent, allowing you to see the internal metal element. With good lighting, look through the top of the fuse for a visible break or gap in the metal strip. However, the most reliable method is to remove the fuse for visual inspection or use a fuse tester or multimeter to check continuity.
Do older vehicles use the same color coding system?
Vehicles manufactured after the mid-1980s generally use standardized blade fuse color codes. Older vehicles may use glass tube fuses (AGC type) or ceramic fuses that don’t follow the blade fuse color system. Check your vehicle’s age and fuse type before relying on color coding.
Where should I buy replacement blade fuses?
Purchase fuses from reputable sources: automotive parts stores, authorized dealers, or well-known online retailers. Avoid ultra-cheap fuses from unknown suppliers, as they may not meet safety standards or provide reliable protection. Quality fuses typically cost $0.50-$2.00 each and are worth the investment for safety and reliability.
Conclusion: Master Blade Fuse Color Codes for Electrical Safety
Understanding blade fuse amperage color codes empowers you to maintain your vehicle’s electrical system safely and effectively. The standardized color system—from tan 5A fuses to green 30A fuses and beyond—provides instant visual identification that prevents dangerous mistakes.
Key takeaways to remember:
- Always replace fuses with the exact amperage rating specified for that circuit
- Match the physical fuse type (mini, standard, or maxi) to your fuse panel
- Never use higher amperage fuses to “solve” repeated blowing
- Keep a quality fuse assortment in your vehicle for emergencies
- Seek professional diagnosis for persistent electrical problems
The color coding system exists to protect you, your vehicle, and expensive electrical components. When a fuse blows, it’s doing its job by preventing greater damage. Use this guide to identify the correct replacement fuse quickly, and always address the underlying cause of repeated fuse failures.
For complex electrical issues, unclear fuse identification, or repeated failures, consult a qualified automotive electrician or your vehicle’s authorized service center. Professional diagnosis ensures your electrical system remains safe, compliant with standards, and properly protected.