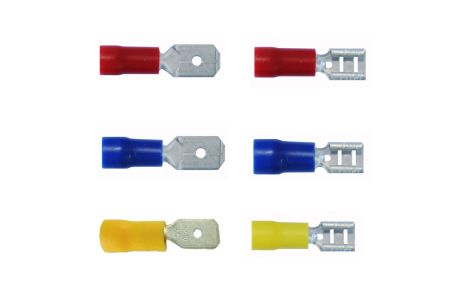
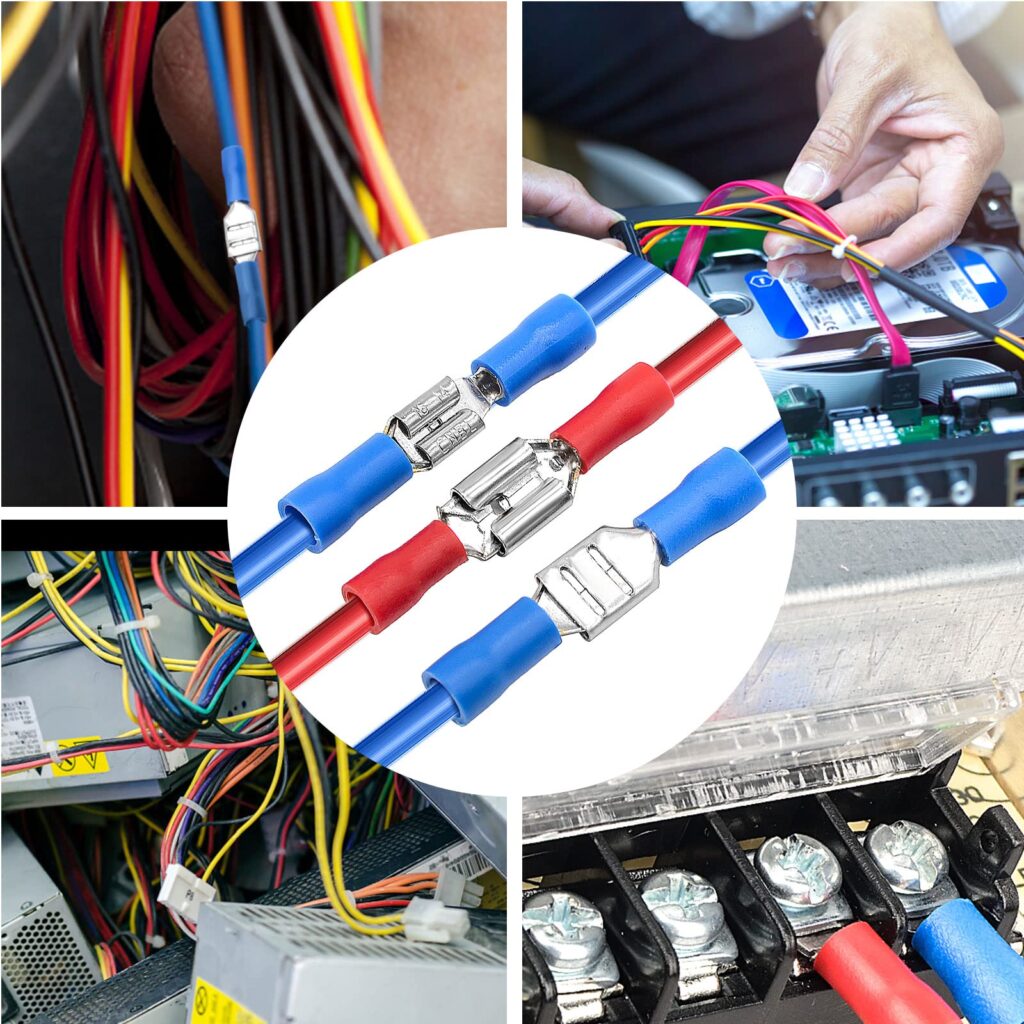
A push-on terminal is a type of electrical connector that creates secure connections by simply pushing the terminal onto a male tab or blade without requiring tools, screws, or soldering. These quick-connect terminals feature a spring-loaded design that grips onto electrical tabs to establish reliable electrical contact while allowing for easy disconnection when needed.
Push-on terminals are essential components in automotive wiring, appliances, and electrical panels where frequent connections and disconnections occur. You’ll find them connecting everything from car stereos to industrial control panels.
Key Definitions: Understanding Push-On Terminal Components

Push-On Terminal: An electrical connector with a female receptacle that slides over and grips a male tab or blade terminal to create an electrical connection.
Blade Terminal: The male counterpart – a flat, rectangular metal tab that inserts into push-on terminals.
Tab Width: The standard measurement (typically 0.187″, 0.25″, or 0.032″) that determines compatibility between push-on terminals and blade terminals.
Contact Area: The internal gripping mechanism inside the terminal that maintains electrical contact and mechanical hold.
Push-On Terminal vs. Other Electrical Connectors: Complete Comparison
| Feature | Push-On Terminals | Screw Terminals | Crimp Terminals | Wire Nuts |
|---|---|---|---|---|
| Installation Speed | Very Fast (seconds) | Slow (minutes) | Fast (30 seconds) | Medium (1-2 minutes) |
| Tools Required | None | Screwdriver | Crimping tool | None |
| Reusability | Excellent | Good | Poor (one-time use) | Good |
| Vibration Resistance | Very Good | Excellent | Excellent | Fair |
| Current Capacity | 10-30 amps typical | 15-40+ amps | 10-50+ amps | 15-20 amps |
| Cost per Connection | $0.10-$0.50 | $0.50-$2.00 | $0.05-$0.25 | $0.02-$0.10 |
| Professional Use | Automotive, appliances | Electrical panels | Permanent wiring | Residential wire joining |
Applications and Use Cases: Where You’ll Find Push-On Terminals

Automotive Applications
- Car stereo connections: Quick-disconnect for radio replacement
- Relay and fuse boxes: Easy component swapping
- Trailer wiring harnesses: Removable connections for maintenance
- Motorcycle electrical systems: Vibration-resistant quick connects
Appliance and HVAC Systems
- Washing machine pumps: Serviceable motor connections
- Refrigerator components: Compressor and fan motor wiring
- Heating system controls: Thermostat and control board connections
- Air conditioning units: Capacitor and contactor wiring
Industrial and Commercial Use
- Control panels: Switchgear and relay connections
- Test equipment: Temporary measurement connections
- Machinery wiring: Quick component replacement
- Electrical enclosures: Panel-mounted component connections
Standard Push-On Terminal Specifications
Common Tab Widths and Applications
| Tab Width | Common Use | Typical Current Rating | Wire Gauge Range |
|---|---|---|---|
| 0.032″ | Small electronics, relays | 3-5 amps | 22-18 AWG |
| 0.187″ | Automotive, small appliances | 10-15 amps | 16-14 AWG |
| 0.25″ | Appliances, HVAC controls | 15-20 amps | 14-12 AWG |
| 0.375″ | Heavy-duty applications | 20-30 amps | 12-10 AWG |
Material and Construction Standards
- Contact Material: Tin-plated brass or phosphor bronze for corrosion resistance
- Insulation: PVC or nylon rated for 300V-600V applications
- Temperature Range: -40°F to 221°F (-40°C to 105°C)
- Compliance: UL Listed components for safety assurance
How to Select the Right Push-On Terminal: Expert Selection Guide
Step 1: Determine Tab Width Requirements
Measure the male blade terminal or check equipment specifications. Use calipers for precise measurement – incorrect sizing leads to poor connections.
Step 2: Calculate Current Requirements
Safety Rule: Choose terminals rated for 125% of maximum expected current. For a 12-amp load, select terminals rated for at least 15 amps.
Step 3: Consider Environmental Factors
- High-vibration applications: Choose terminals with enhanced spring tension
- Outdoor use: Specify terminals with UV-resistant insulation
- High-temperature environments: Select terminals rated above ambient temperature
Step 4: Evaluate Wire Gauge Compatibility
Match the terminal’s wire accommodation range to your conductor size. Oversized terminals create loose connections; undersized terminals won’t accept the wire.
Installation Best Practices: Step-by-Step Process
Proper Installation Sequence
- Strip wire insulation to match terminal barrel length (typically 0.25″-0.375″)
- Insert stripped wire into terminal barrel until conductor bottoms out
- Crimp terminal barrel using appropriate crimping tool and die
- Inspect crimp quality – wire should not pull out under moderate tension
- Test-fit on blade terminal before final installation
- Push terminal fully onto blade until it seats completely
Safety Requirements and Code Compliance
⚠️ SAFETY WARNING
Always de-energize circuits before making connections. Verify zero energy state with appropriate test equipment.
NEC Compliance Notes:
- Terminals must be UL Listed for intended application
- Wire fill limitations apply in electrical enclosures
- Proper strain relief required for flexible connections
- Temperature ratings must exceed ambient conditions
Troubleshooting Common Push-On Terminal Problems
Poor Connection Symptoms and Solutions
| Problem | Symptom | Cause | Solution |
|---|---|---|---|
| Intermittent Operation | Equipment cycles on/off | Loose terminal connection | Replace terminal, check tab width |
| Overheating | Warm terminals, burning smell | High resistance connection | Clean contacts, replace if corroded |
| Terminal Won’t Stay On | Frequent disconnections | Worn spring contacts | Replace with new terminal |
| No Electrical Contact | Complete loss of function | Corroded or damaged contacts | Clean or replace terminal and tab |
Professional Service Recommendations
When to Call an Electrician:
- Connections involving 240V or higher voltages
- Work inside electrical service panels
- Installation requiring permits or inspections
- Any situation beyond your skill or comfort level
Expert Tips for Optimal Performance
💡 Professional Tip
Apply dielectric grease to outdoor connections to prevent corrosion and ensure long-term reliability.
💡 Quality Indicator
High-quality terminals have visible spring steel contacts and thick, flexible insulation.
💡 Connection Test
A properly installed push-on terminal should require firm, deliberate force to remove – not just finger pressure.
💡 Maintenance Schedule
Inspect push-on connections annually in vibration-prone applications like automotive and machinery.
Quick Reference: Push-On Terminal Selection Chart
By Application Type
| Application | Recommended Tab Width | Current Rating | Special Features |
|---|---|---|---|
| Automotive Relays | 0.187″ | 15 amp | Vibration-resistant |
| Appliance Motors | 0.25″ | 20 amp | High-temperature rated |
| Control Circuits | 0.032″ | 5 amp | Compact design |
| HVAC Contactors | 0.25″ | 20-30 amp | Arc-resistant contacts |
Frequently Asked Questions
What makes push-on terminals different from other electrical connectors?
Push-on terminals offer tool-free installation and removal, making them ideal for applications requiring frequent disconnection. Unlike screw terminals that require tools, or wire nuts that create permanent joints, push-on terminals provide secure, reusable connections.
How much current can push-on terminals safely handle?
Standard push-on terminals handle 10-30 amps depending on size and construction. Always select terminals rated for 125% of your maximum expected load to ensure safety margins.
Are push-on terminals safe for household electrical work?
Yes, when properly selected and installed. Use UL-listed terminals appropriate for your voltage and current requirements. However, consult local electrical codes – some jurisdictions restrict their use in certain applications.
What should you look for when buying push-on terminals?
Choose terminals with visible spring steel contacts, thick insulation rated for your voltage, and UL listing. Quality terminals have consistent crimp barrels and smooth, burr-free edges that won’t damage wire insulation.
How do you prevent push-on terminals from coming loose?
Ensure proper size match between terminal and blade tab, use terminals designed for high-vibration applications when needed, and consider mechanical strain relief for mobile applications.
Can push-on terminals be reused after removal?
High-quality terminals can typically be reused several times if the spring contacts aren’t damaged. However, inspect terminals for signs of wear, corrosion, or deformation before reuse.
What’s the difference between male and female push-on terminals?
Male terminals (blade or tab terminals) are the flat, rectangular connectors that plug into female terminals. Female terminals (push-on terminals) are the receptacles that slide over and grip the male tabs.
Do push-on terminals meet electrical code requirements?
UL-listed push-on terminals meet most electrical codes when used within their ratings. However, specific applications may have additional requirements – consult local codes for panel work or permanent installations.
Professional Recommendation
For safety and code compliance, always use UL-listed push-on terminals appropriate for your specific application. When in doubt about electrical connections, especially those involving high voltages or permanent installations, consult with a qualified electrician to ensure proper installation and code compliance.
Push-on terminals offer excellent versatility and convenience for electrical connections, but proper selection and installation are essential for safe, reliable operation.

