The best way to crimp electrical wires is using a ratcheting crimping tool with properly sized terminals, following NEC code requirements for compression ratios and pull-test standards. This method ensures reliable electrical connections that meet safety standards and prevent connection failure over time.
Proper crimping creates secure, permanent electrical connections that are essential for safe electrical work. Whether you’re a professional electrician or DIY enthusiast, understanding correct crimping techniques can prevent electrical fires, equipment damage, and costly repairs.
What is Wire Crimping? Key Definitions You Need to Know

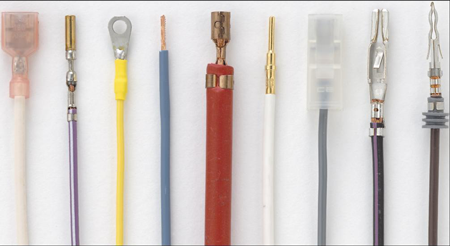
Wire crimping is the process of joining two pieces of electrical wire or connecting wire to a terminal using mechanical compression. The crimping tool deforms a metal connector (crimp terminal) around the wire, creating a gas-tight seal that provides both electrical continuity and mechanical strength.
Essential Crimping Terms
- Crimp Terminal: Metal connector that joins wires or connects wire to equipment
- Compression Ratio: The percentage reduction in terminal diameter during crimping
- Pull Test: Quality verification method measuring connection strength
- Ratcheting Tool: Crimping tool that maintains consistent pressure until full compression
- Wire Gauge: Standard measurement of wire diameter (AWG system)
- Insulation Displacement: Terminal type that cuts through wire insulation automatically
Wire Crimping vs. Other Connection Methods: Complete Comparison
| Connection Method | Reliability | Cost | Permanence | NEC Compliance | Best Use Case |
|---|---|---|---|---|---|
| Proper Crimping | Excellent | Moderate | Permanent | Yes | Professional installations |
| Wire Nuts | Good | Low | Semi-permanent | Yes | Residential junction boxes |
| Soldering | Excellent | High | Permanent | Limited use | Electronics/repairs |
| Push-in Connectors | Fair | Low | Semi-permanent | Limited | Temporary connections |
| Screw Terminals | Good | Moderate | Removable | Yes | Equipment connections |
What Makes Crimping Different from Soldering?

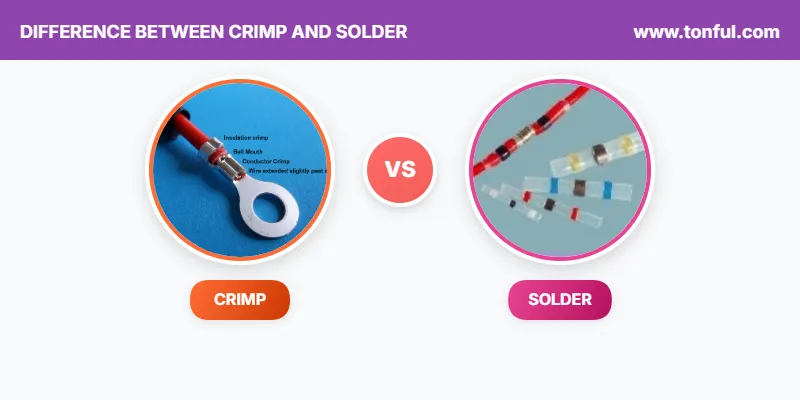
Crimping creates a cold weld through mechanical compression, while soldering uses heat to create a metallurgical bond. Crimping offers several advantages:
- Faster installation – No heating time required
- Vibration resistance – Mechanical connection withstands movement
- No flux contamination – Eliminates corrosion from flux residue
- Field-repairable – Can be performed without specialized equipment
⚠️ Safety Warning: Never solder crimped connections. This violates electrical codes and can cause connection failure due to different thermal expansion rates.
Types of Crimping Applications and When to Use Each
1. Terminal Crimping (Wire-to-Equipment Connections)
- Ring terminals: Permanent connections to screw terminals
- Spade terminals: Quick-disconnect equipment connections
- Pin terminals: Multi-pin connector applications
- Butt splice terminals: Joining two wire ends permanently
2. Splice Crimping (Wire-to-Wire Connections)
- Butt splices: Straight-through wire joining
- Parallel splices: Tapping into existing circuits
- Multi-port splices: Connecting multiple wires to one point
3. Specialized Crimping Applications
- Coaxial connectors: RF/cable TV installations
- Data cable terminations: Network and communication systems
- Automotive connections: Vehicle electrical systems
- Marine applications: Corrosion-resistant connections
How to Crimp Wires: Step-by-Step Professional Process
Step 1: Calculate Required Materials
Wire gauge matching is critical for safe connections. Use this reference:
| Wire Gauge (AWG) | Terminal Size | Crimping Tool Die | Pull Test Minimum |
|---|---|---|---|
| 12 AWG | 12-10 | Yellow die | 35 lbs |
| 14 AWG | 14-12 | Blue die | 25 lbs |
| 16 AWG | 16-14 | Red die | 20 lbs |
| 18 AWG | 18-16 | Red die | 15 lbs |
| 20 AWG | 20-18 | Red die | 10 lbs |
Step 2: Prepare the Wire
- Strip insulation to manufacturer’s specifications (typically 5/16″ for terminals)
- Inspect copper for nicks, corrosion, or damage
- Twist stranded wires clockwise to prevent fraying
- Clean contacts with electrical contact cleaner if oxidized
💡 Expert Tip: Use automatic wire strippers for consistent strip length. Manual stripping can nick conductors and reduce connection strength.
Step 3: Select Proper Terminal and Tool
- Match wire gauge to terminal specifications exactly
- Verify tool calibration using gauge blocks
- Check ratcheting mechanism operation
- Select appropriate die for terminal size
Step 4: Execute the Crimp
- Insert wire fully into terminal barrel until insulation touches crimp area
- Position terminal in tool with seam facing up
- Squeeze handles until ratchet releases automatically
- Verify compression – barrel should be uniform with no splits
Step 5: Quality Verification
- Visual inspection: No wire strands visible outside terminal
- Pull test: Apply specified force without connection failure
- Continuity test: Verify electrical connection with multimeter
⚠️ Safety Critical: Never re-crimp a connection. Damaged terminals must be cut off and replaced with new hardware.
What Should You Look for When Choosing Crimping Tools?
Professional-Grade Tool Features
| Feature | Benefit | Why It Matters |
|---|---|---|
| Ratcheting Mechanism | Consistent compression | Prevents under-crimping |
| Calibrated Dies | Precise terminal sizing | Meets manufacturer specs |
| Ergonomic Handles | Reduced hand fatigue | Enables repeated use |
| Wire Gauge Markings | Quick size identification | Prevents mismatching |
| Replaceable Dies | Tool longevity | Cost-effective maintenance |
Top-Rated Crimping Tool Comparison
| Tool Brand/Model | Price Range | Best For | Key Feature |
|---|---|---|---|
| Klein VDV226-110 | $150-200 | Professional use | Ratcheting with multiple dies |
| Panduit CT-930 | $200-300 | Industrial applications | Precise compression control |
| Thomas & Betts WT111M | $100-150 | General electrical | Versatile terminal compatibility |
| Burndy Y35 | $300-400 | Heavy-duty applications | Hydraulic compression |
💡 Professional Recommendation: Invest in quality tools with replaceable dies. Cheap crimpers produce inconsistent connections that fail electrical code requirements.
Common Crimping Problems and How to Fix Them
Problem: Loose Connections (High Resistance)
Symptoms: Heat generation, voltage drop, intermittent operation
Causes:
- Under-crimping (insufficient compression)
- Wrong terminal size for wire gauge
- Oxidized wire or terminal
Solutions:
- Use calibrated ratcheting tool
- Verify wire gauge with strippers
- Clean connections before crimping
Problem: Wire Pullout (Mechanical Failure)
Symptoms: Complete circuit loss, visible wire separation
Causes:
- Insufficient strip length
- Damaged conductor strands
- Wrong crimp location
Solutions:
- Follow manufacturer strip length specifications
- Inspect wire for damage before crimping
- Position crimp on conductor area only
Problem: Terminal Splits or Cracks
Symptoms: Visible metal damage, connection failure
Causes:
- Over-crimping (excessive compression)
- Wrong tool die size
- Brittle terminal material
Solutions:
- Use proper die for terminal size
- Replace damaged terminals immediately
- Verify tool calibration regularly
Professional Safety Requirements and Code Compliance
NEC Code Requirements for Crimped Connections
Article 110.3(B): Equipment and materials must be installed per manufacturer instructions
Article 110.14(A): Terminals must be identified for conductor material and size
Section 300.13: Mechanical continuity of grounding conductors
Required Pull Test Standards
| Application | Minimum Pull Force | Test Duration |
|---|---|---|
| Branch Circuit Wiring | 35 lbs (12 AWG) | 10 seconds |
| Control Circuits | 25 lbs (14 AWG) | 10 seconds |
| Low Voltage | 15 lbs (18 AWG) | 10 seconds |
| Grounding Conductors | 50% greater than circuit conductors | 10 seconds |
⚠️ Code Compliance Warning: All crimped connections in permanent installations must meet local electrical code requirements. Consult local authorities having jurisdiction (AHJ) for specific regulations.
Quick Reference: Crimping Selection Guide
Choose Crimping When:
- ✅ Permanent connections required
- ✅ Vibration resistance needed
- ✅ Fast installation priorities
- ✅ Code compliance mandated
- ✅ Professional appearance desired
Avoid Crimping When:
- ❌ Temporary connections needed
- ❌ Frequent disconnection required
- ❌ Mixed metal compatibility issues
- ❌ Extreme temperature environments (-40°F to +200°F limits)
Expert Tips for Professional-Quality Crimps
🔧 Tool Maintenance: Calibrate crimping tools annually using go/no-go gauges. Replace worn dies immediately to maintain compression accuracy.
🔧 Environment Considerations: Store terminals in dry conditions. Moisture contamination causes oxidation that increases connection resistance.
🔧 Quality Control: Perform pull tests on 10% of connections in critical applications. Document results for warranty compliance.
🔧 Wire Preparation: Use cutting tools designed for electrical wire. Utility knives can create stress concentrations that cause failure.
🔧 Terminal Selection: Choose terminals with inspection windows when possible. Visual verification improves quality assurance.
Frequently Asked Questions About Wire Crimping
What is the difference between insulated and non-insulated terminals?
Insulated terminals have plastic sleeves that prevent accidental contact and provide strain relief. Non-insulated terminals offer smaller profiles but require additional protection in live circuits. Use insulated terminals for voltages above 50V or in crowded electrical panels.
How do you know if a crimp is good?
A proper crimp has uniform compression with no visible copper strands, passes the specified pull test, and shows no terminal damage. The connection should have the same resistance as an equivalent length of wire.
Can you crimp solid wire?
Yes, but with caution. Solid wire requires different terminals and compression ratios than stranded wire. Many terminals are designed specifically for one wire type. Always verify terminal specifications before crimping solid conductors.
What happens if you over-crimp a connection?
Over-crimping can crack terminals, cut conductor strands, or create stress concentrations that fail over time. The connection may initially test good but fail during thermal cycling or vibration.
How often should crimping tools be calibrated?
Professional tools should be calibrated annually or after 10,000 cycles. Critical applications may require more frequent calibration. Use certified gauge blocks and document calibration for code compliance.
What is the minimum temperature for crimping?
Most terminals are rated for crimping between 32°F and 100°F. Cold weather makes metals brittle and can cause cracking. Allow tools and terminals to reach working temperature before use.
Can you reuse crimp terminals?
Never reuse crimp terminals. The deformation process work-hardens the metal and reduces its ability to maintain proper compression. Always use new terminals for each connection.
What wire stripping length should you use?
Strip length should match terminal specifications exactly, typically 5/16″ for most ring and spade terminals. Too little insulation removal prevents full insertion. Too much creates exposed conductor that violates electrical codes.
When to Call a Professional Electrician
While DIY crimping is appropriate for many applications, call a licensed electrician for:
- Service panel connections (requires permits and inspection)
- High-voltage applications (over 600V)
- Critical safety systems (fire alarms, emergency lighting)
- Code compliance questions (local regulations vary)
- Commercial installations (professional liability required)
Professional crimping ensures code compliance, safety, and warranty protection for critical electrical connections.

