Direct Answer: To crimp automotive electrical connectors, strip the wire to the proper length, insert it fully into the connector terminal, position the terminal in the correct crimp tool die, and squeeze firmly until the crimp tool releases. A proper crimp should create a gas-tight seal with adequate pull strength while maintaining electrical conductivity.
Crimping automotive electrical connectors is a fundamental skill for anyone working on vehicle electrical systems. When done correctly, crimped connections provide superior reliability compared to twist-and-tape joints, lasting the entire life of the vehicle while maintaining optimal electrical conductivity and weather resistance.
What Are Automotive Electrical Connectors?

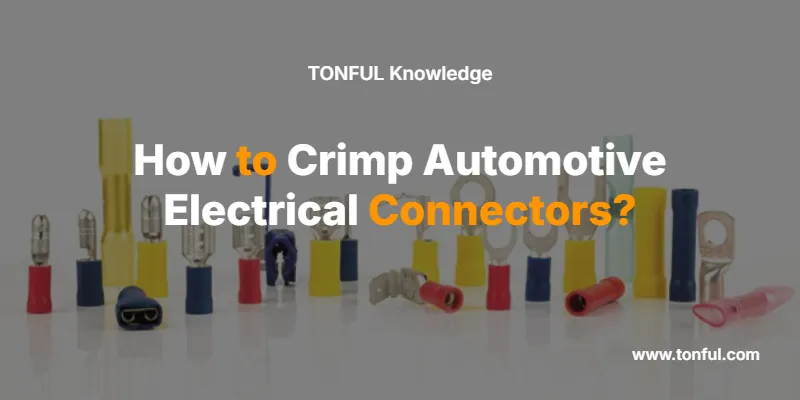
Automotive electrical connectors are specialized terminals and housings designed to create secure, weatherproof electrical connections in vehicle systems. Unlike household electrical connections, automotive connectors must withstand vibration, temperature extremes, moisture, road salt, and other harsh conditions while maintaining reliable electrical contact.
Key components include:
- Terminals: Metal contacts that grip the wire and connect to the mating terminal
- Housings: Plastic bodies that protect connections and ensure proper alignment
- Seals: Rubber gaskets that prevent moisture and contamination entry
- Locks: Mechanisms that secure terminals within housings and prevent disconnection
Key Differences: Crimp vs. Solder vs. Wire Nuts
| Connection Method | Strength | Weather Resistance | Vibration Resistance | Installation Time | Cost |
|---|---|---|---|---|---|
| Crimp Terminals | Excellent | Excellent | Excellent | Fast (30 seconds) | Low |
| Solder Joints | Good | Good (with heat shrink) | Poor | Slow (5+ minutes) | Medium |
| Wire Nuts | Poor | Poor | Very Poor | Fast (15 seconds) | Very Low |
| Twist & Tape | Very Poor | Very Poor | Very Poor | Medium (2 minutes) | Very Low |
🏆 Expert Recommendation: Crimped connections are the automotive industry standard because they create gas-tight seals that prevent corrosion while maintaining flexibility under vibration.
Types of Automotive Connector Terminals
Ring Terminals
Purpose: Secure connection to bolts, studs, and ground points
Wire Gauge Range: 22 AWG to 4/0 AWG
Applications: Battery terminals, ground straps, starter connections
Spade Terminals
Purpose: Quick-disconnect connections for switches and relays
Wire Gauge Range: 22 AWG to 10 AWG
Applications: Fuse boxes, relay sockets, switch connections
Butt Connectors
Purpose: Joining two wire ends together
Wire Gauge Range: 22 AWG to 10 AWG
Applications: Wire repairs, harness modifications, splice connections
Bullet Connectors
Purpose: In-line connections that can be easily disconnected
Wire Gauge Range: 20 AWG to 12 AWG
Applications: Headlight connections, trailer wiring, accessory power
Essential Crimping Tools and Equipment
Professional Crimping Tools
| Tool Type | Wire Gauge Capacity | Typical Cost | Best For |
|---|---|---|---|
| Ratcheting Crimper | 22-10 AWG | $25-50 | General automotive work |
| Heat Shrink Crimper | 22-10 AWG | $40-80 | Weather-resistant connections |
| Heavy-Duty Crimper | 4/0-8 AWG | $100-200 | Battery cables, starter wiring |
| Professional Multi-Tool | 22-8 AWG | $150-300 | High-volume work |
Required Support Equipment
- Wire strippers (adjustable or multi-gauge)
- Heat gun (for heat-shrink terminals)
- Digital multimeter (for connection verification)
- Wire brush (for cleaning corroded terminals)
- Electrical tape (for additional protection)
⚠️ Safety Warning: Never use pliers, side cutters, or other improvised tools for crimping. These create unreliable connections that can fail and cause electrical fires or system malfunctions.
Step-by-Step Crimping Process
Phase 1: Preparation and Safety
- Turn off vehicle ignition and disconnect battery negative terminal
- Select correct terminal based on wire gauge and application
- Inspect wire condition – replace if corroded, nicked, or damaged
- Clean work area to prevent contamination during installation
Phase 2: Wire Preparation
- Measure strip length using terminal as guide (typically 1/4 to 3/8 inch)
- Strip wire insulation cleanly without nicking copper strands
- Inspect stripped wire – all copper strands should be intact and bright
- Twist stranded wire lightly to prevent fraying during insertion
💡 Professional Tip: Strip slightly less insulation than you think you need. You can always strip more, but you can’t add insulation back.
Phase 3: Terminal Installation
- Insert wire fully into terminal barrel until insulation touches barrel edge
- Verify proper insertion – no copper visible outside terminal, no insulation inside barrel
- Position terminal in correct crimp tool die (check tool markings)
- Align terminal squarely to ensure even compression across barrel width
Phase 4: Crimping Execution
- Squeeze crimp tool firmly until ratchet mechanism releases (if equipped)
- Inspect crimp visually – barrel should show clear compression marks
- Perform pull test – gently tug wire to verify secure connection
- Check electrical continuity with multimeter if critical connection
🔧 Quality Check Standards:
- Visual: Terminal barrel shows even compression dimples
- Physical: Wire cannot be pulled from terminal with moderate force
- Electrical: Resistance across connection under 0.001 ohms
Connector Housing Assembly
Installing Terminals in Housings
- Identify terminal position using wiring diagram or housing markings
- Insert terminal fully until lock tab engages with audible click
- Verify lock engagement by gently pulling on wire
- Install sealing plugs in unused housing positions
Weather Sealing Best Practices
- Apply dielectric grease to terminal contacts before assembly
- Ensure seal integrity – inspect rubber seals for cuts or damage
- Mate connectors firmly until locking mechanism engages
- Position away from heat sources and potential damage areas
Common Applications and Use Cases

Engine Bay Connections
Environment: High heat, vibration, chemical exposure
Recommended Terminals: Heat-resistant, sealed connectors
Special Considerations: Use marine-grade terminals for extreme conditions
Interior Connections
Environment: Moderate temperature, minimal moisture
Recommended Terminals: Standard insulated terminals
Special Considerations: Consider appearance for visible connections
Trailer and External Lighting
Environment: Weather exposure, road salt, vibration
Recommended Terminals: Fully sealed, corrosion-resistant terminals
Special Considerations: Use heat-shrink terminals with adhesive lining
Audio and Accessory Power
Environment: Interior mounting, occasional moisture
Recommended Terminals: Gold-plated for signal integrity
Special Considerations: Avoid voltage drop in power connections
Terminal Selection Criteria
Wire Gauge Compatibility
| Wire Gauge (AWG) | Terminal Size | Color Code | Typical Applications |
|---|---|---|---|
| 22-18 | Small | Red | Signal wires, sensors |
| 16-14 | Medium | Blue | Accessory power, lighting |
| 12-10 | Large | Yellow | Heavy accessories, motors |
| 8-4 | Extra Large | None | Starter circuits, alternator |
Material Specifications
- Copper terminals: Standard automotive use, good conductivity
- Tin-plated copper: Enhanced corrosion resistance
- Marine-grade: Maximum corrosion resistance for extreme environments
Troubleshooting Common Crimp Problems
Poor Connection Symptoms
Signs: Intermittent operation, voltage drop, heating at connection
Causes: Incomplete crimp, corrosion, wrong terminal size
Solutions: Re-crimp with proper tool, clean connections, verify terminal sizing
Mechanical Failure
Signs: Wire pulls from terminal, terminal breaks
Causes: Over-crimping, under-crimping, damaged wire strands
Solutions: Use calibrated tools, inspect wire before crimping, verify crimp tool condition
Corrosion Issues
Signs: Green/white buildup, high resistance, connection failure
Causes: Moisture entry, dissimilar metals, chemical exposure
Solutions: Use sealed terminals, apply dielectric grease, avoid aluminum-copper connections
⚠️ Safety Alert: Never attempt to repair crimped connections by re-crimping over existing crimps. Cut off old terminal and install new terminal properly.
Professional Installation Standards
Automotive Industry Requirements
- SAE J1128: Standard for automotive primary wire
- SAE J163: Terminals for automotive wiring harnesses
- ISO 8092: Road vehicles – electrical connections
Certification and Training
ASE Certification: Automotive Service Excellence electrical systems certification
IPC Standards: Electronics industry training for crimping techniques
OEM Training: Manufacturer-specific connector and tool requirements
Quality Assurance Testing
- Pull test: Verify mechanical connection strength
- Continuity test: Confirm electrical pathway integrity
- Resistance measurement: Check for acceptable voltage drop
- Environmental test: Verify performance under operating conditions
Expert Tips for Professional Results
🔧 Tool Maintenance:
- Keep crimp tools calibrated and properly adjusted
- Clean tool dies regularly to prevent contamination buildup
- Replace worn dies to maintain proper crimp geometry
- Store tools in dry environment to prevent corrosion
⚡ Connection Optimization:
- Use minimum wire length for connections to reduce voltage drop
- Avoid sharp bends near terminals that can cause stress concentration
- Route wires away from heat sources and moving parts
- Support heavy terminals with proper strain relief
🛡️ Long-Term Reliability:
- Apply thin coat of dielectric grease to prevent corrosion
- Use heat-shrink terminals in high-moisture environments
- Mark connections clearly for future service and troubleshooting
- Document modifications for warranty and safety compliance
When to Seek Professional Help
Consult automotive electrician for:
- High-current circuits (over 30 amperes)
- Safety-critical systems (airbags, ABS, steering)
- Computer-controlled circuits (ECM, TCM, BCM connections)
- Warranty considerations (manufacturer-approved methods only)
⚠️ Legal Compliance: Some automotive electrical work requires professional certification or may void vehicle warranties if performed incorrectly.
Quick Reference Crimp Chart
| Connection Type | Wire Gauge | Terminal Color | Tool Setting | Pull Test Force |
|---|---|---|---|---|
| Signal Wire | 20-18 AWG | Red | Small | 15 lbs |
| Power Feed | 16-14 AWG | Blue | Medium | 25 lbs |
| Heavy Load | 12-10 AWG | Yellow | Large | 35 lbs |
| Starter Circuit | 8-4 AWG | None | X-Large | 50+ lbs |
Frequently Asked Questions
How do I know if my crimp is good enough?
A proper crimp will show even compression marks on the terminal barrel, the wire cannot be pulled out with reasonable force, and electrical continuity is maintained. The terminal should not be deformed or cracked.
Can I reuse automotive terminals?
No, automotive terminals are designed for single use. The crimping process permanently deforms the terminal, and reuse can result in unreliable connections and electrical failures.
What’s the difference between insulated and non-insulated terminals?
Insulated terminals have plastic sleeves that provide electrical isolation and strain relief. Non-insulated terminals offer better heat dissipation but require additional protection from short circuits.
Should I solder after crimping for extra security?
Generally no. Proper crimps create gas-tight seals that prevent corrosion. Adding solder can create a rigid joint that fails under vibration and actually reduces long-term reliability.
How often should I replace automotive electrical connections?
Properly installed crimped connections should last the vehicle’s lifetime. Inspect connections during routine maintenance and replace if you see corrosion, damage, or signs of overheating.
What causes automotive electrical connections to fail?
The primary causes are corrosion from moisture entry, vibration fatigue from poor installation, and overheating from inadequate current capacity or poor connections.
Can I use household electrical connectors on automotive applications?
No, household connectors are not designed for automotive environments. They lack the vibration resistance, weather sealing, and temperature ratings required for vehicle use.
How do I choose between different crimp tool options?
For occasional use, a quality ratcheting crimper handles most automotive work. Professional installers benefit from dedicated tools for specific terminal types and gauges, while heat-shrink crimpers with built-in heating are ideal for weather-exposed connections.
Professional Recommendation: Master the art of crimping automotive electrical connectors through proper tool selection, technique practice, and adherence to industry standards. Quality connections are essential for vehicle reliability, safety, and long-term electrical system performance. When in doubt about critical connections, consult with certified automotive electrical professionals to ensure proper installation and compliance with manufacturer requirements.

