When it comes to outdoor electrical installations in residential projects, waterproof wire nuts are non-negotiable safety components. Whether you’re installing landscape lighting, connecting outdoor outlets, or wiring a deck, understanding proper precautions can prevent electrical failures, code violations, and serious safety hazards. This comprehensive guide covers everything homeowners need to know about using waterproof wire nuts safely and effectively.
Understanding Waterproof Wire Nuts and Their Critical Role
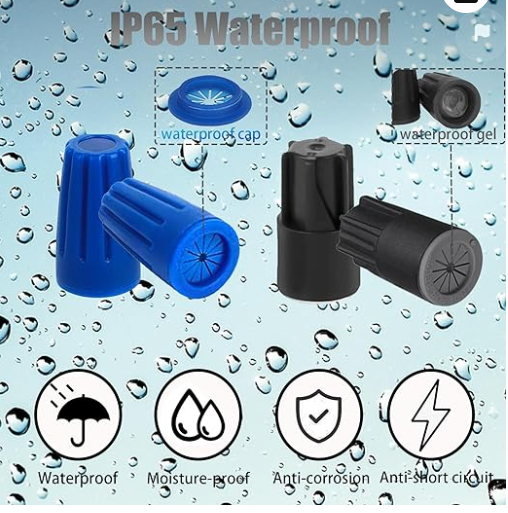
Waterproof wire nuts are specialized electrical connectors designed to create moisture-resistant connections in outdoor and wet location applications. Unlike standard wire nuts that leave gaps where moisture can infiltrate, waterproof wire nuts feature integrated sealing mechanisms—including silicone gaskets, gel-filled chambers, or grease-filled cavities—that prevent water ingress, corrosion, and electrical failures.

The fundamental difference between standard and waterproof connectors lies in their environmental protection rating. Standard wire nuts are rated for dry locations only and will fail inspection in wet locations, leading to rapid corrosion and potential electrical hazards. Waterproof connectors must meet specific IP (Ingress Protection) ratings and comply with NEC (National Electrical Code) requirements for wet location applications.
NEC Code Requirements for Residential Outdoor Wiring
Understanding National Electrical Code requirements is essential for safe and compliant waterproof wire nut installations. NEC Article 300.5(B) specifically mandates wet location-rated connectors for all direct burial applications, while Article 680 governs installations near swimming pools and water features.
Key NEC Compliance Requirements
| NEC Article | Application | Waterproof Wire Nut Requirement |
|---|---|---|
| 300.5(B) | Direct burial wiring | IP67 minimum rating required |
| 680 | Pool/spa lighting (within 10 feet) | IP68 gel-filled connectors mandatory |
| 210.8(A)(3) | Outdoor receptacles (residential) | GFCI protection + waterproof enclosures |
| 406.9 | Wet location outlets | Extra-duty covers + waterproof connections |
| 410.10 | Outdoor lighting fixtures | Wet location-rated connectors required |
All outdoor residential wiring must use UL-listed waterproof connectors that meet or exceed the environmental conditions of the installation site. Standard wire nuts with electrical tape do not meet code requirements and will fail inspection. For proper sizing guidance, refer to our detailed guide on how to choose the right size waterproof wire nut for AWG.

Critical Precautions for Waterproof Wire Nut Installation
Proper installation technique determines whether your waterproof wire nut connection will last for decades or fail within months. Following these critical precautions ensures safety, longevity, and code compliance.
Pre-Installation Preparation
Before making any connections, verify that power is completely shut off at the circuit breaker. Use a non-contact voltage tester to confirm zero voltage at the work site—this is a non-negotiable safety step that prevents electrical shock.
Wire preparation is equally critical. Strip wire insulation according to manufacturer specifications, typically 3/4 inch for most residential applications. Clean copper conductors with a wire brush if any corrosion is present. For stranded wire connections, twist individual strands tightly before joining to solid conductors to prevent loose connections.
Proper Connection Technique
The most common installation mistake homeowners make is failing to pre-twist wires before applying the connector. Hold wires together with ends perfectly even, then twist clockwise with lineman pliers for at least 3-4 complete turns. This pre-twisting creates the primary mechanical bond—the waterproof wire nut serves as insulation and environmental protection, not the primary connection.
Thread the waterproof wire nut clockwise until you feel firm resistance, then add one quarter turn with an appropriate tool. Over-tightening can damage wire strands and create weak points, while under-tightening leaves gaps for moisture infiltration. After installation, perform a tug test by gently pulling each wire individually—a properly installed connector will hold firm without any wire movement.

For detailed installation procedures for outdoor lighting systems, consult our waterproof wire nuts installation guide for outdoor lighting.
Common Installation Mistakes That Compromise Safety
Even experienced DIYers make critical errors when installing waterproof wire nuts. Understanding these common mistakes helps you avoid dangerous situations and code violations.
Wire Preparation Errors
Using incorrect strip length is the most frequent mistake. Too much exposed conductor creates shock hazards and potential short circuits, while insufficient stripping prevents adequate contact area. Always follow the strip gauge molded into quality waterproof wire nuts or manufacturer specifications.
Mixing solid and stranded wires without proper technique causes loose connections over time. When joining these different wire types, extend stranded wire slightly beyond solid wire (approximately 1/8 inch), then twist together so the stranded wire wraps around the solid conductor.
Connector Selection and Sizing Mistakes
| Mistake | Consequence | Correct Practice |
|---|---|---|
| Using undersized connector | Loose connection, overheating, fire risk | Match wire gauge and count to capacity chart |
| Using oversized connector | Inadequate grip, wire pullout | Select smallest connector that accommodates wire combination |
| Wrong IP rating for application | Moisture infiltration, corrosion | IP67 minimum for outdoor; IP68 for burial/submersion |
| Indoor-rated wire nuts outdoors | Code violation, rapid failure | Use only UL-listed waterproof connectors |
| Ignoring temperature ratings | Connector degradation, failure | Verify -40°F to 221°F rating for extreme climates |
Choosing the wrong connector type for your specific application leads to premature failure. For comprehensive guidance on connector selection, review our article on how to choose waterproof wire connectors.
Environmental Protection Failures
Failing to apply adequate torque when securing the connector is a critical mistake. Some waterproof wire nuts require specific torque values to properly compress the silicone seal and activate the waterproofing mechanism. Under-torquing leaves gaps for moisture entry, while over-torquing can crack the connector body or damage the seal.
Neglecting secondary protection measures in harsh environments compromises long-term reliability. In direct burial applications, even IP68-rated connectors benefit from installation inside waterproof junction boxes. For coastal or marine environments where salt spray accelerates corrosion, apply dielectric grease to conductors before connection.

Application-Specific Precautions for Residential Projects
Different outdoor applications require specific precautions to ensure safe, code-compliant installations. Understanding these application-specific requirements prevents costly mistakes and safety hazards.
Landscape and Garden Lighting
Low-voltage landscape lighting (12-24V) requires waterproof wire nuts rated for direct burial even though the voltage is non-lethal. NEC Article 300.5(A) mandates 6-inch minimum burial depth for low-voltage wiring, and all connections must use waterproof connectors to prevent corrosion that causes dim lights or complete system failure.
For line-voltage landscape lighting (120V), use IP67-rated waterproof wire nuts as minimum protection. Install connections inside waterproof junction boxes whenever possible, and ensure all fixtures and connectors are listed for wet locations. Never bury connections without proper waterproof protection, even if wrapped with electrical tape—this violates code and creates serious safety hazards.
Outdoor Receptacles and GFCI Circuits
All outdoor receptacle installations require GFCI protection per NEC 210.8(A)(3), and the 2023 NEC removed previous exceptions for residential properties. When wiring outdoor outlets, use waterproof wire nuts for all connections inside the outlet box, even though the box itself provides some weather protection.
Pay special attention to the wire nut connections on GFCI devices, as these critical safety devices must maintain reliable connections to function properly. Use appropriately sized waterproof connectors that won’t loosen due to thermal cycling or vibration from opening/closing weatherproof covers.
Pool, Spa, and Water Feature Wiring
Swimming pool and spa installations fall under NEC Article 680, which imposes the strictest requirements for waterproof connections. Any electrical connection within 10 feet of water requires IP68-rated gel-filled connectors capable of continuous submersion. Standard silicone-sealed wire nuts do not meet this requirement.
Professional installation is typically required for pool wiring due to complex bonding and grounding requirements. If you’re performing any pool-related electrical work, consult local building codes and consider hiring a licensed electrician familiar with Article 680 requirements.
Deck and Patio Lighting
Deck lighting installations present unique challenges due to exposure to rain, snow, and temperature extremes. Use waterproof wire nuts rated for the full temperature range of your climate zone (-40°F to 221°F for most quality connectors). Mount all connections in accessible locations for future maintenance—never bury connections under permanent deck structures.
For deck post cap lights and rail lighting, route wiring through weatherproof conduit and make all connections inside waterproof junction boxes. This provides double protection against moisture infiltration and simplifies future troubleshooting or repairs.
Waterproof Wire Nut Comparison by Application
| Application | Minimum IP Rating | Connector Type | Additional Requirements |
|---|---|---|---|
| Landscape lighting (low voltage) | IP67 | Silicone-sealed or gel-filled | Direct burial rated, 6″ depth minimum |
| Outdoor receptacles | IP67 | Silicone-sealed | GFCI protection required |
| Pool/spa lighting | IP68 | Gel-filled only | NEC Article 680 compliance |
| Deck/patio lighting | IP67 | Silicone-sealed | Temperature rating -40°F to 221°F |
| Direct burial wiring | IP68 | Gel-filled preferred | Junction box recommended |
| Sprinkler system valves | IP68 | Gel-filled | Continuous submersion rating |
For specific product recommendations and detailed specifications, explore our complete range of waterproof wire connector solutions.

Maintenance and Inspection Best Practices
Waterproof wire nut connections require periodic inspection to ensure continued safety and performance. Establishing a regular maintenance schedule prevents unexpected failures and identifies potential problems before they become dangerous.
Inspection Schedule and Procedures
Inspect all outdoor electrical connections annually, preferably in early spring before peak usage season. After severe weather events—including heavy storms, flooding, or extreme temperature swings—perform additional inspections to verify connection integrity.
Visual inspection should check for physical damage to connector bodies, including cracks, discoloration, or deformation. Examine wire entry points for gaps or separation that indicates seal failure. Look for corrosion on exposed wire ends or green oxidation on copper conductors, which signals moisture infiltration.
When to Replace Waterproof Wire Nuts
Waterproof wire nuts are generally not reusable after removal. The silicone seals compress during installation and lose their sealing capability when disturbed. If you must disconnect a waterproof connection for any reason, always install a fresh connector when reconnecting.
Replace waterproof wire nuts immediately if you observe any of these warning signs: visible cracks or damage to the connector body, corrosion on wire ends, loose connections that allow wire movement, discoloration indicating overheating, or any moisture inside the connector cavity.
For guidance on identifying quality connectors that offer superior longevity, read our article on how to identify the quality of a crimp terminal, as similar quality indicators apply to waterproof wire nuts.
Selecting Quality Waterproof Wire Nuts
Not all waterproof wire nuts offer equal performance or safety. Selecting quality connectors from reputable manufacturers ensures code compliance, longevity, and reliable protection in demanding outdoor environments.
Quality Indicators and Certifications
Always verify UL listing on waterproof wire nuts before purchase. UL certification confirms the connector meets rigorous safety standards for electrical performance, fire resistance, and environmental protection. Look for clear IP rating markings (IP67 or IP68) molded into the connector body or printed on packaging.
Quality waterproof wire nuts feature thick, durable silicone seals that remain flexible across the full temperature range. Inferior connectors use thin rubber seals that crack in cold weather or become brittle with UV exposure. Transparent or translucent connector bodies allow visual verification of proper wire insertion and gel filling.
Material Quality and Construction
Premium waterproof wire nuts use high-grade materials that resist UV degradation, chemical exposure, and mechanical stress. The connector body should be manufactured from flame-retardant, impact-resistant thermoplastic that won’t crack during installation or service life.
Internal spring mechanisms should provide consistent pressure to maintain tight wire contact over years of thermal cycling. Gel-filled connectors should use non-hardening, dielectric gel that remains pliable and maintains its waterproofing properties indefinitely.
TONFUL waterproof wire nuts incorporate all these quality features along with rigorous testing and certification. Our connectors meet or exceed all NEC requirements and provide reliable performance in the harshest residential outdoor environments. For comprehensive product specifications, visit our waterproof wire nut manufacturer page.
Tools and Accessories for Professional Results
Having the right tools ensures proper installation and helps avoid the common mistakes that compromise waterproof wire nut connections. While waterproof wire nuts can be installed by hand, certain tools improve consistency and reliability.
Essential Installation Tools
A quality wire stripper with adjustable gauges prevents the most common wire preparation mistakes. Automatic wire strippers that adjust to wire gauge eliminate the risk of nicking conductors or leaving incorrect strip length. For professional results, invest in a wire stripper designed specifically for electrical work rather than general-purpose cutting tools.
Lineman’s pliers are essential for pre-twisting wires before connector installation. The flat gripping surface and long handles provide the leverage needed to create tight, uniform wire twists. Never use needle-nose pliers or standard slip-joint pliers for this task—they lack the gripping surface area for proper wire twisting.
A non-contact voltage tester is a non-negotiable safety tool for any electrical work. These inexpensive devices detect live voltage without physical contact, allowing you to verify power is off before beginning work. Test every wire, even if you’re certain the breaker is off—mistakes in circuit mapping are common in residential electrical panels.
Recommended Tool Kit for Homeowners
| Tool | Purpose | Quality Indicator |
|---|---|---|
| Wire stripper (adjustable) | Remove insulation without damaging conductor | Gauge markings, cushioned grips, clean cutting edges |
| Lineman’s pliers | Pre-twist wires before connector installation | Flat gripping surface, high-leverage design |
| Non-contact voltage tester | Verify power is off before work | LED and audible indicators, CAT III rating |
| Wire gauge tool | Identify wire size for proper connector selection | Clear markings for AWG sizes 10-22 |
| Flashlight/headlamp | Illuminate work area for proper inspection | Hands-free design, bright LED output |
| Dielectric grease | Additional corrosion protection in harsh environments | Silicone-based, non-conductive formulation |
For complete electrical tool solutions, explore our electrical tools manufacturer page featuring professional-grade tools designed for reliable residential installations.
Troubleshooting Common Waterproof Wire Nut Problems
Even with proper installation, waterproof wire nut connections can develop problems over time. Understanding how to diagnose and resolve these issues prevents minor problems from becoming major safety hazards.
Diagnosing Connection Problems
Intermittent operation of outdoor lights or outlets often indicates loose wire connections inside waterproof wire nuts. This typically results from inadequate pre-twisting during installation or using an undersized connector that doesn’t provide sufficient grip. To diagnose, turn off power and carefully remove the connector to inspect the wire twist—if wires separate easily, the connection was inadequate.
Visible corrosion on wire ends signals moisture infiltration and seal failure. Green or white oxidation on copper conductors indicates the waterproof wire nut has failed to prevent moisture ingress. This requires complete connection replacement, including cutting back corroded wire to clean copper and installing a fresh waterproof connector.
Overheating evidence—including discolored connectors, melted insulation, or burnt odors—indicates serious problems requiring immediate attention. Overheating typically results from loose connections creating high resistance, undersized connectors for the current load, or poor quality connectors with inadequate contact pressure.
Resolution Strategies
For loose connections, always replace the waterproof wire nut rather than attempting to reuse it. Cut wires back to clean copper, strip to proper length, pre-twist thoroughly with lineman’s pliers, and install a correctly sized fresh connector. Verify proper installation with a firm tug test on each wire.
When moisture infiltration has caused corrosion, cut back wires beyond the corroded section until you reach bright, clean copper. In severe cases, this may require running new wire if insufficient length remains. After making the new connection with a quality waterproof wire nut, consider adding secondary protection such as installation inside a waterproof junction box.
If overheating has occurred, investigate the root cause before making repairs. Verify the wire gauge is adequate for the circuit amperage, ensure the connector size matches the wire combination, and confirm the total connected load doesn’t exceed circuit capacity. Never simply replace an overheated connector without addressing the underlying cause.
Professional Installation vs. DIY Considerations
While many waterproof wire nut installations fall within the capabilities of experienced DIYers, certain situations require professional electrical expertise. Understanding when to call a licensed electrician ensures safety and code compliance.
When to Hire a Professional Electrician
Complex outdoor electrical projects involving new circuit installation, service panel modifications, or multiple branch circuits should be handled by licensed electricians. These projects require proper load calculations, circuit protection sizing, and thorough knowledge of NEC requirements that go beyond simple connection techniques.
Swimming pool and spa electrical work falls under NEC Article 680, which imposes strict requirements for bonding, grounding, and GFCI protection. The complexity and critical safety implications of pool wiring make professional installation essential. Most jurisdictions require licensed electricians for pool electrical work and mandate inspection before operation.
Any installation requiring permits and inspections benefits from professional installation. Licensed electricians understand local code amendments, maintain relationships with building inspectors, and guarantee their work meets all requirements. The cost of professional installation is often offset by avoiding failed inspections and costly rework.
DIY-Appropriate Projects
Homeowners with basic electrical knowledge can safely handle simple outdoor projects like replacing existing light fixtures, adding landscape lighting to existing circuits, or making waterproof connections in accessible junction boxes. These projects involve straightforward connections using waterproof wire nuts without modifying circuits or adding new loads.
Low-voltage landscape lighting installation (12-24V systems) presents minimal safety risks and provides excellent DIY learning opportunities. While waterproof connections are still essential for reliability, the low voltage eliminates shock hazards. This makes landscape lighting an ideal first outdoor electrical project for developing skills.
Maintenance and inspection of existing outdoor connections falls well within DIY capabilities. Learning to identify potential problems, perform visual inspections, and replace degraded waterproof wire nuts helps maintain safe outdoor electrical systems and prevents expensive emergency repairs.
For additional guidance on related electrical components, explore our resources on automotive electrical connectors and terminals connectors, which share similar connection principles.
Frequently Asked Questions
Q: Can I use regular wire nuts with electrical tape for outdoor connections?
A: No, standard wire nuts with electrical tape do not provide adequate moisture protection for outdoor applications and will fail code inspection. Only UL-listed waterproof wire nuts rated for wet locations meet NEC requirements and ensure safe, reliable outdoor connections.
Q: What’s the difference between IP67 and IP68 waterproof ratings?
A: IP67-rated connectors protect against temporary water immersion up to 1 meter for 30 minutes, suitable for most outdoor applications exposed to rain and splashing. IP68-rated connectors withstand continuous submersion beyond 1 meter depth, required for direct burial applications and installations near pools or water features. For detailed comparisons, see our guide on IP67 vs IP68 waterproof wire nut comparison.
Q: Can waterproof wire nuts be reused after disconnection?
A: No, waterproof wire nuts should not be reused after removal. The silicone seals compress during initial installation and lose their sealing capability when disturbed. Always install a fresh waterproof connector when reconnecting wires to ensure proper moisture protection. Read more in our article about risks of reusing waterproof wire nuts.
Q: How do I know what size waterproof wire nut to use?
A: Count the total number of wires you’re connecting and note their gauge (AWG). Match this combination to the manufacturer’s capacity chart printed on the packaging. Typically, small connectors (yellow/red) work for 14-22 AWG wires, medium (blue/orange) for 12-18 AWG, and large (gray/tan) for 10-14 AWG combinations.
Q: Are waterproof wire nuts required for GFCI outdoor outlets?
A: While GFCI protection is mandatory for outdoor outlets per NEC 210.8(A)(3), using waterproof wire nuts for connections inside the outlet box provides additional protection against moisture infiltration and corrosion. This is considered best practice even though the weatherproof box provides some protection.
Q: How often should I inspect outdoor waterproof wire nut connections?
A: Inspect all outdoor electrical connections annually, preferably in early spring before peak usage season. Perform additional inspections after severe weather events including heavy storms, flooding, or extreme temperature swings. Replace any connectors showing signs of damage, corrosion, or moisture infiltration immediately.
Conclusion: Ensuring Long-Term Safety and Reliability
Proper waterproof wire nut installation represents a critical safety measure for all residential outdoor electrical projects. By following the precautions outlined in this guide—including correct connector selection, proper installation technique, and regular maintenance—homeowners can ensure safe, code-compliant outdoor electrical systems that provide decades of reliable service.
Remember that waterproof wire nuts are not optional accessories but essential safety components required by electrical code for all wet location applications. Investing in quality connectors from reputable manufacturers like TONFUL, using proper installation techniques, and performing regular inspections protects your home, your family, and your investment in outdoor electrical infrastructure.
For complex projects or situations requiring professional expertise, don’t hesitate to consult a licensed electrician. The cost of professional installation is minimal compared to the potential consequences of improper outdoor electrical connections. Whether you choose DIY installation or professional help, prioritizing safety and code compliance ensures your outdoor electrical systems perform reliably for years to come.
For more information about quality waterproof electrical components and professional installation guidance, visit TONFUL Electric or explore our comprehensive range of waterproof wire connector products.